Introduction
Toad for SQL Server is an integrated development environment (IDE) for accessing, administering and using SQL Server. The SQL Server may be on a local machine or may be on a remote platform such as AWS RDS, EC2, Azure, or Google Cloud Platform. In this tutorial we shall discuss using Toad for SQL Server with a SQL Server instance on AWS RDS.
This tutorial has the following sections.
- Setting the Environment
- Creating a SQL Server RDS DB Instance
- Creating a Connection to RDS
- Creating a Database Table
- Adding Table Data
- Querying a Database Table
- Exploring a Database
- Dropping a Database Table
- Disconnecting & Connecting with RDS
- Removing a Connection
Setting the Environment
Download Toad for SQL Server 2017 Trial edition (or another edition) from https://www.quest.com/register/54726/ . Double-click on the toad_for_sqlserver_2017_x86_trial_full.exe application to install Toad for SQL Server using the Installer, as shown in Figure 1.
Figure 1. Installing Toad for SQL Server
The Toad for SQL Server toolset user interface is shown in Figure 2.
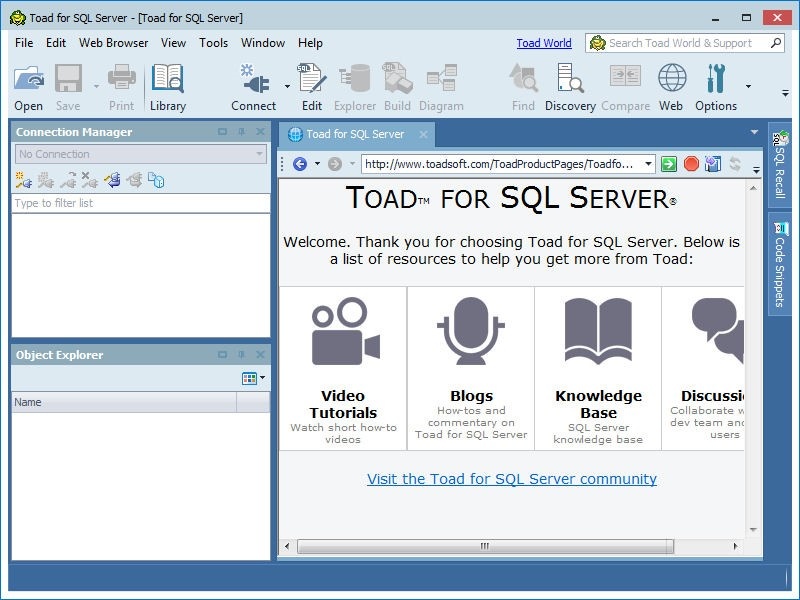
Figure 2. Toad for SQL Server User Interface
Creating a SQL Server RDS DB Instance
To create a SQL Server RDS DB instance click on Get Started Now in the RDS Dashboard as shown in Figure 3.
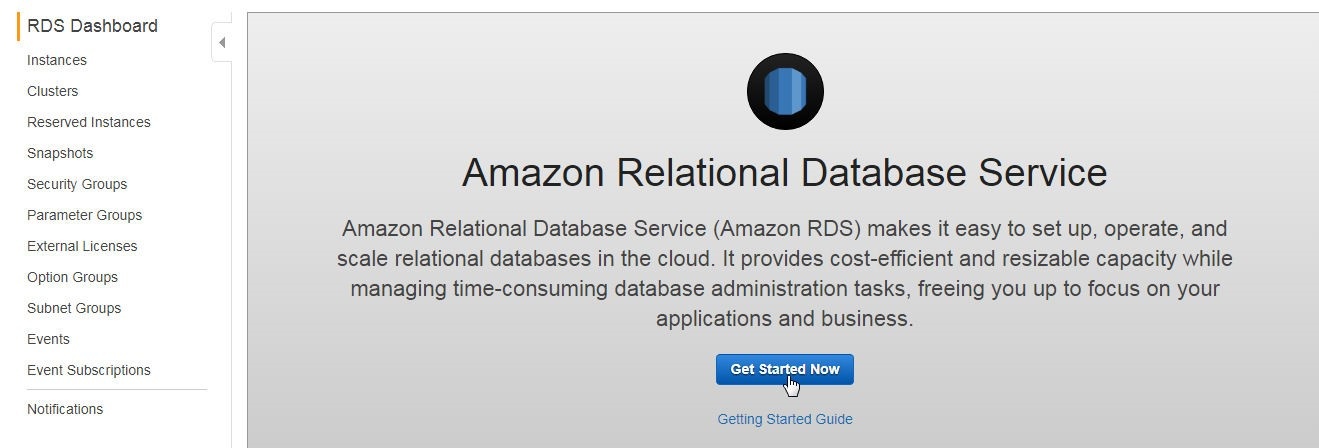
Figure 3. RDS Dashboard>Get Started Now
RDS provides the SQL Server editions discussed in Table 1.
Table 1. SQL Server Editions
|
SQL Server Edition |
Description |
|
SQL Server Express |
Microsoft SQL Server Express Edition is a general purpose edition that supports database sizes up to 10GB. |
|
SQL Server Web |
Microsoft SQL Server Web Edition is designed to be used only to support public and Internet-accessible webpages, websites, web applications, and web services. |
|
SQL Server SE |
Microsoft SQL Server Standard Edition is designed to provide core data management for applications with mixed database workloads. |
|
SQL Server EE |
Microsoft SQL Server Enterprise Edition provides enterprise-level, high-end features for applications with high database workloads. |
Select SQL Server Express engine as shown in Figure 4. One of the other choices may also be selected. We have used SQL Server Express because it is a lightweight edition.
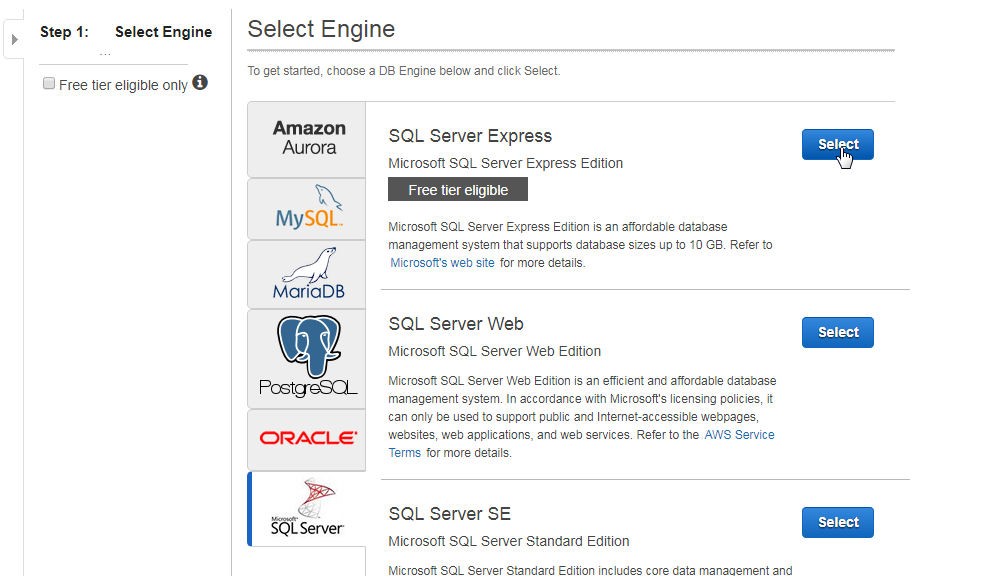
Figure 4. Selecting SQL Server Engine
In Specify DB Details select the checkbox ‘Only show options that are eligible for RDS Free tier’ as shown in Figure 5. Use the default settings and optionally select a Time Zone.
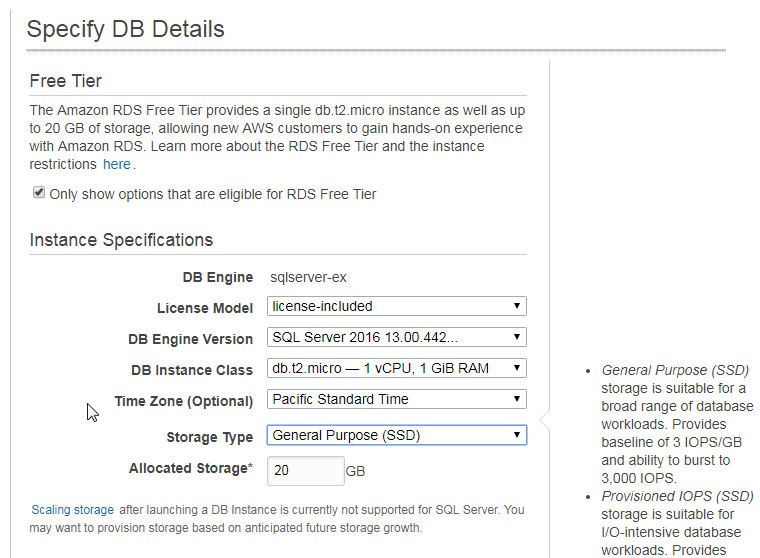
Figure 5. Specify DB Details
In Settings specify a DB Instance Identifier (sqlserverdb) and specify a Master Username and Master Password as shown in Figure 6.
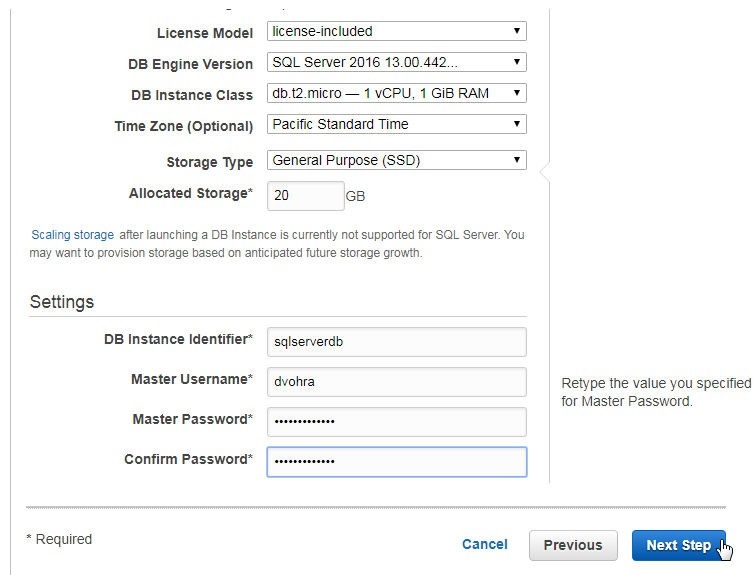
Figure 6. Specifying DB Settings
In Configure Advanced Settings select a VPC and a Subnet Group, and set Publicly Accessible option to Yes. Select Availability Zone as No Preference and select VPC Security Group option to Create new Security Group as shown in Figure 7. As we won’t be using Windows Authentication set Directory for Windows authentication as None.
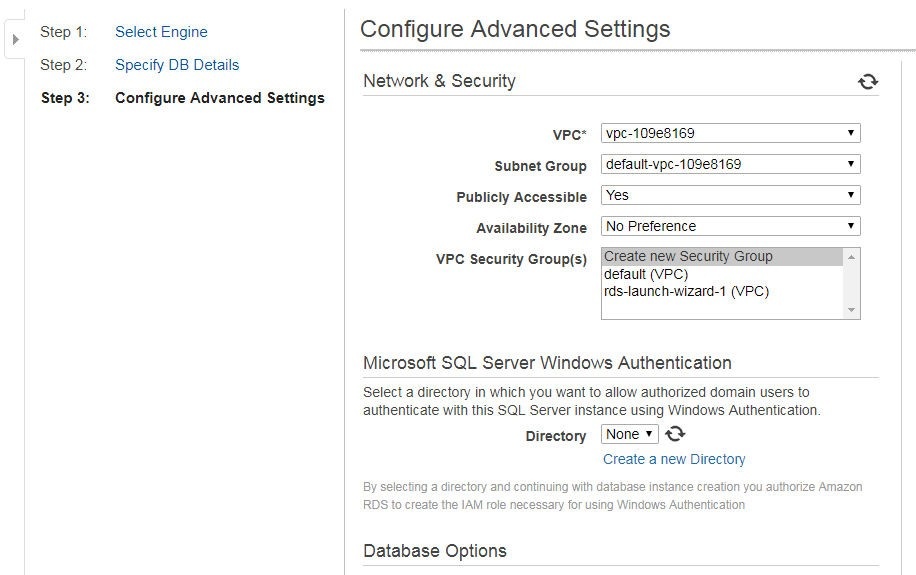
Figure 7. Configure Advanced Settings
Use the default settings for Database Options, Backup, Monitoring, Maintenance as shown in Figure 8 and click on Launch DB Instance.
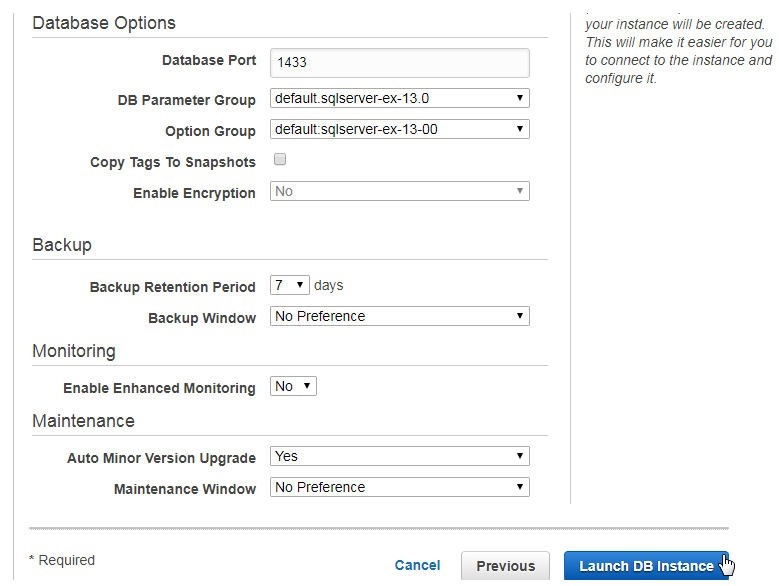
Figure 8. Database Options, Backup, Monitoring, and Maintenance
A SQL Server DB instance gets created on RDS, as shown in Figure 9.
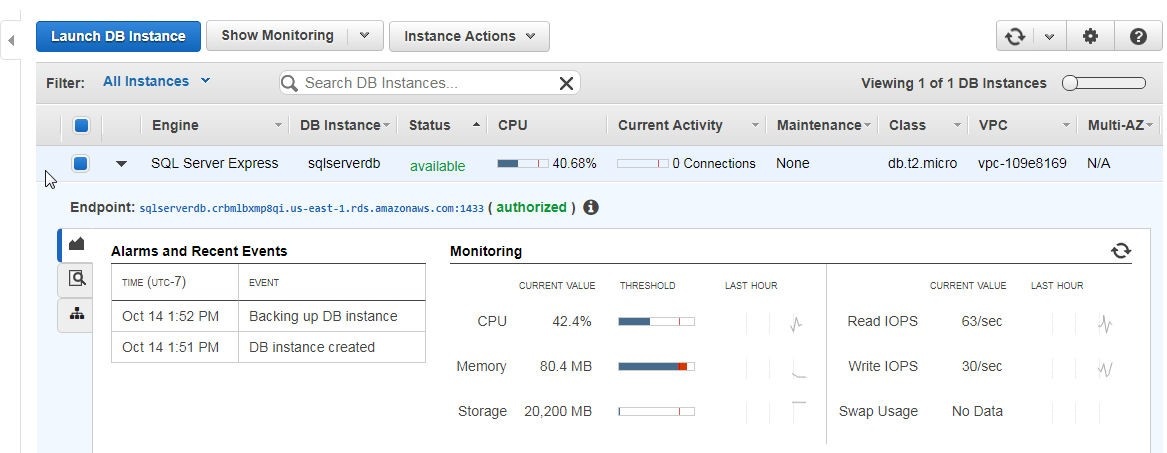
Figure 9. SQL Server DB instance on RDS
Click on the Security Groups link as shown in Figure 10 to modify the Inbound rules to allow all traffic from all source IP addresses or at least from the IP address of the machine on which Toad for SQL Server is installed.
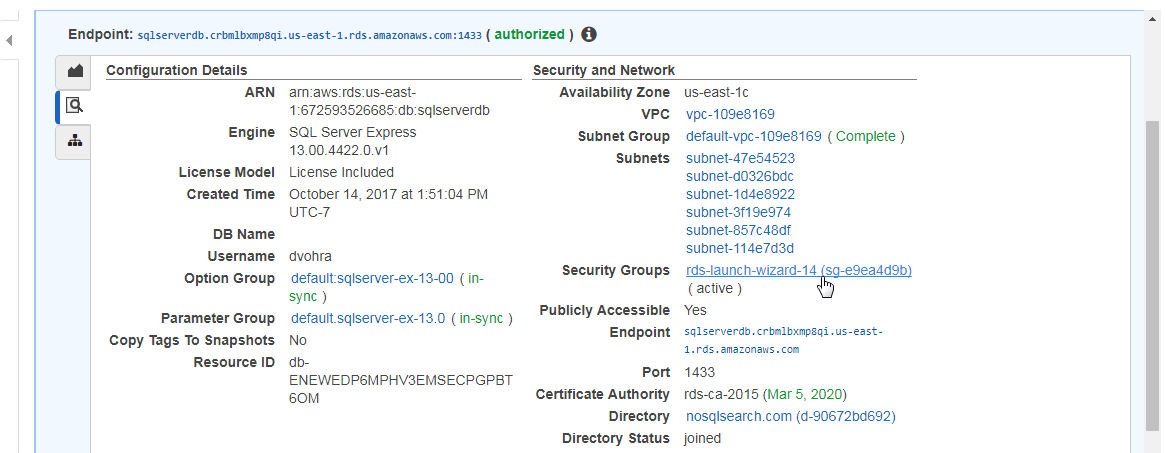
Figure 10. Security Group Link
Click on the Inbound tab and click on Edit as shown in Figure 11.

Figure 11. Modifying Inbound Rules
In Edit Inbound rules set Type to All traffic, Protocol to All, Port Range to 0-65535, Source to Anywhere, and click on Save as shown in Figure 12.
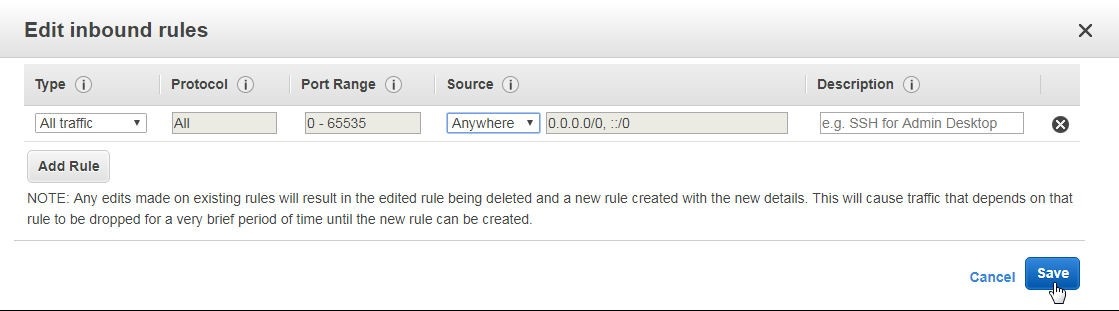
Figure 12. Edit Inbound Rules
The Outbound rules are set to allow all traffic of all protocol in all port range to all destination, as shown in Figure 13.
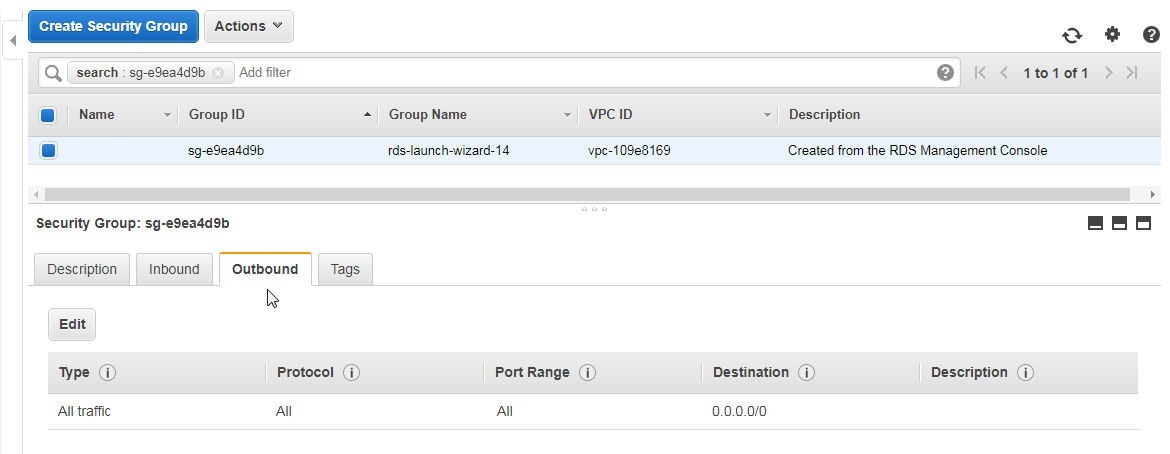
Figure 13. Outbound Rules
Creating a Connection to RDS
To connect to RDS click on Connect>New Connection as shown in Figure 14.
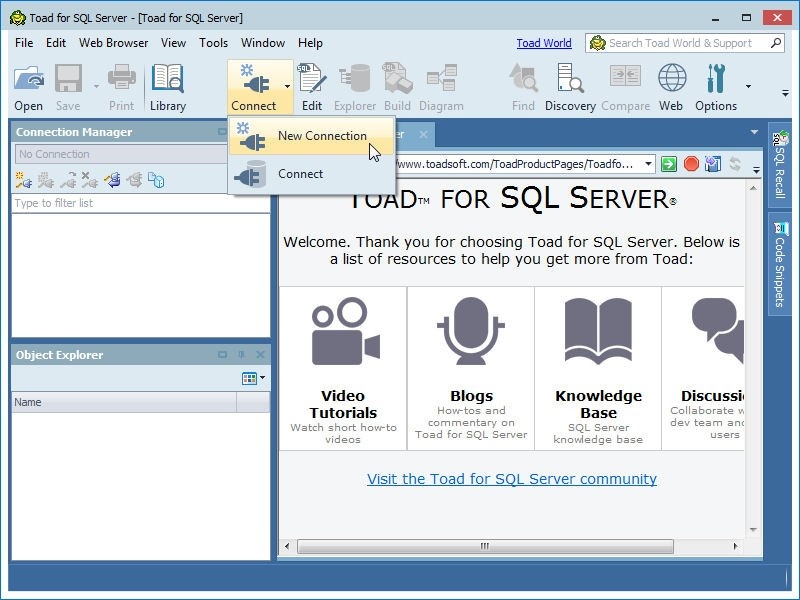
Figure 14. Selecting Connect>New Connection
Copy the Endpoint from the RDS console as shown in Figure 15. We shall use the endpoint substring preceding the “:1433” port suffix as the Server name when we configure a connection in Toad for SQL Server.
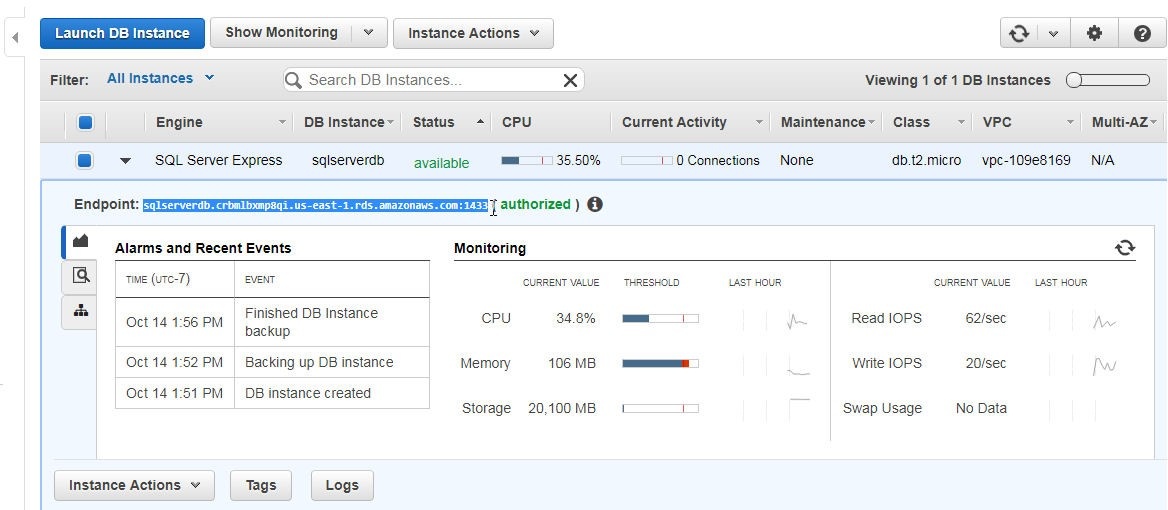
Figure 15. Obtaining Endpoint from RDS Console
In the Create New Connection wizard specify Server name as the Endpoint without the port suffix as shown in Figure 16. For Authentication select SQL Server Authentication. For Login specify the Master User name (which could be different for different users) configured in the RDS DB instance and specify the Password as the Master Password for the RDS DB instance. Click on the Database selection button … as shown in Figure 16.
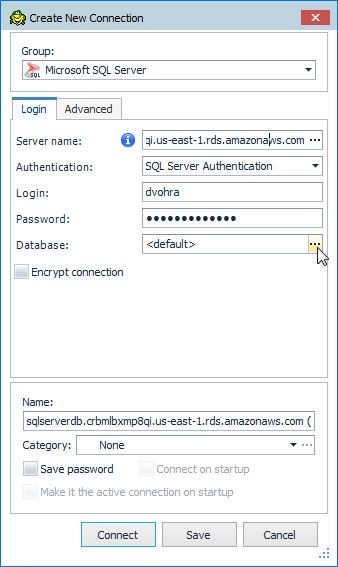
Figure 16. Create New Connection
In Browse Databases select User Databases>rdsadmin as shown in Figure 17. Click on OK.
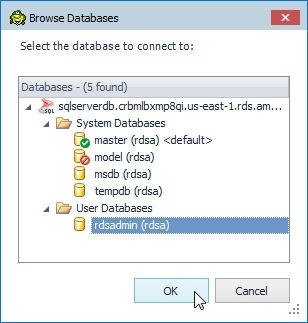
Figure 17. Selecting a Database
Click on Connect in the Create New Connection as shown in Figure 18.
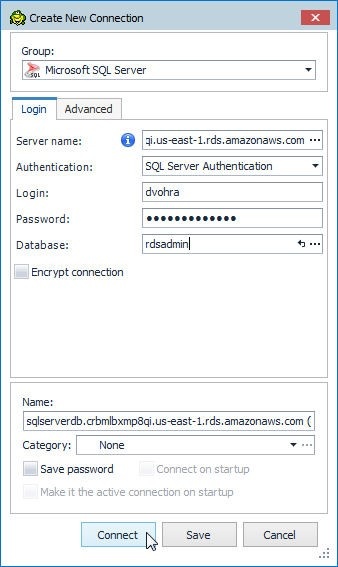
Figure 18. Create New Connection>Connect
A new connection gets added in Connection Manager as shown in Figure 19. By default the rdsadmin database is selected.
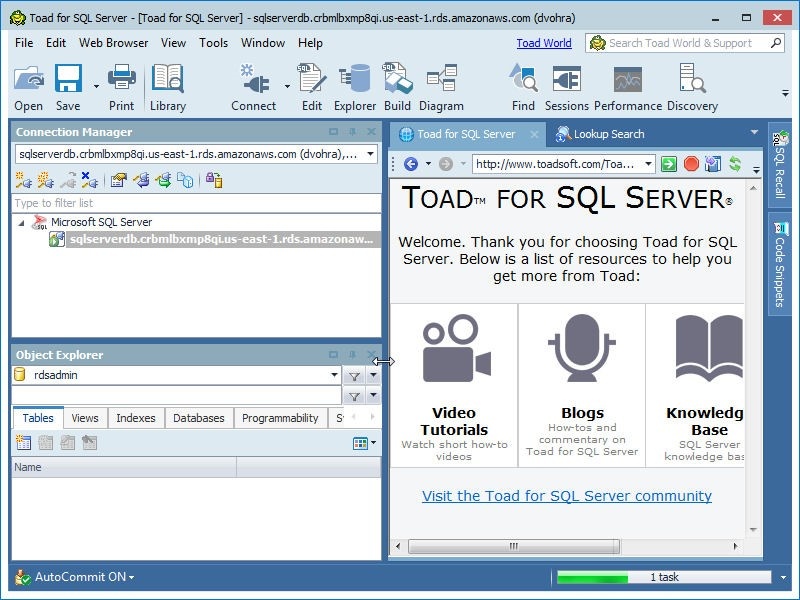
Figure 19. New Connection in Connection Manager
Creating a Database Table
To create a database table a database must be selected. Select the tempdb database in Object Explorer as shown in Figure 20.
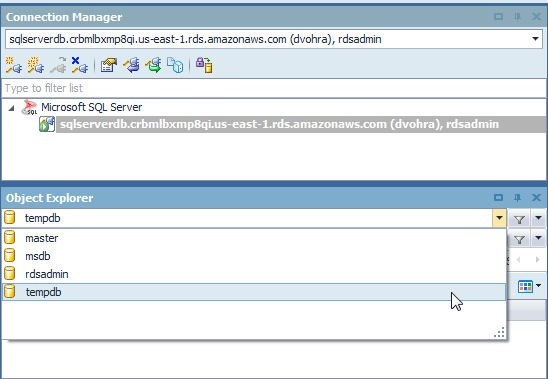
Figure 20. Selecting Database as tempdb
Click on Create a table to create a database table as shown in Figure 21.
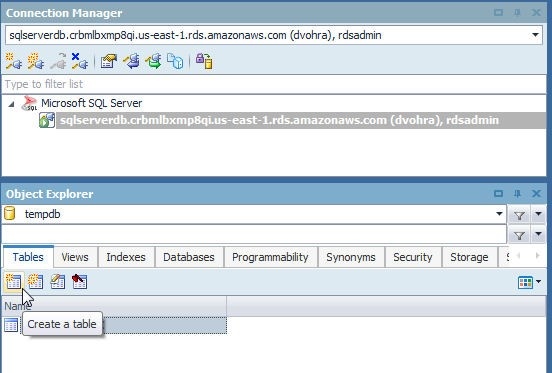
Figure 21. Create a table
In the Create Table wizard the Database is shown to be selected as tempdb and Schema is selected as dbo by default, as shown in Figure 22. A table name must be specified in the Name field.
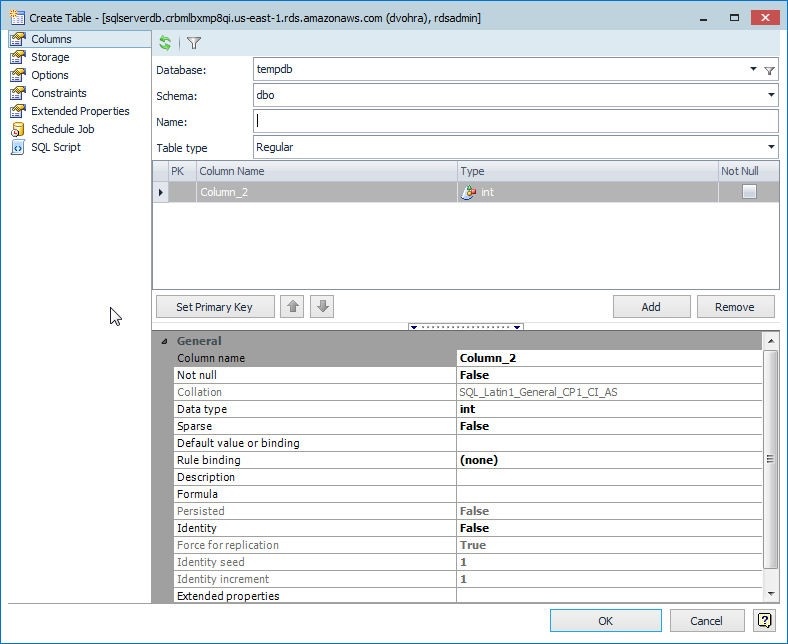
Figure 22. Create Table Wizard
By default one column is listed. Modify the Column Name to logid and click on the Not Null checkbox as shown in Figure 23. Click on Set Primary Key.
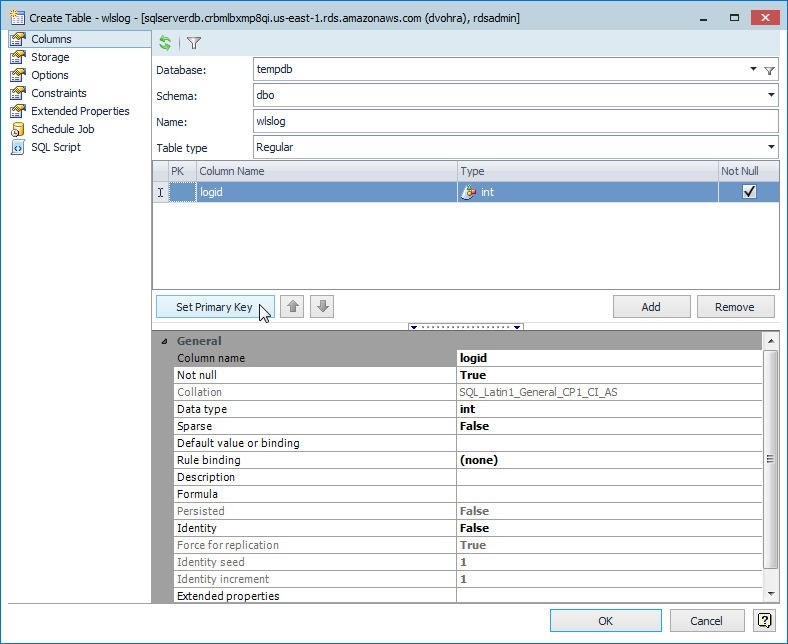
Figure 23. Setting Primary Key Column
Click on Add to add another column as shown in Figure 24.
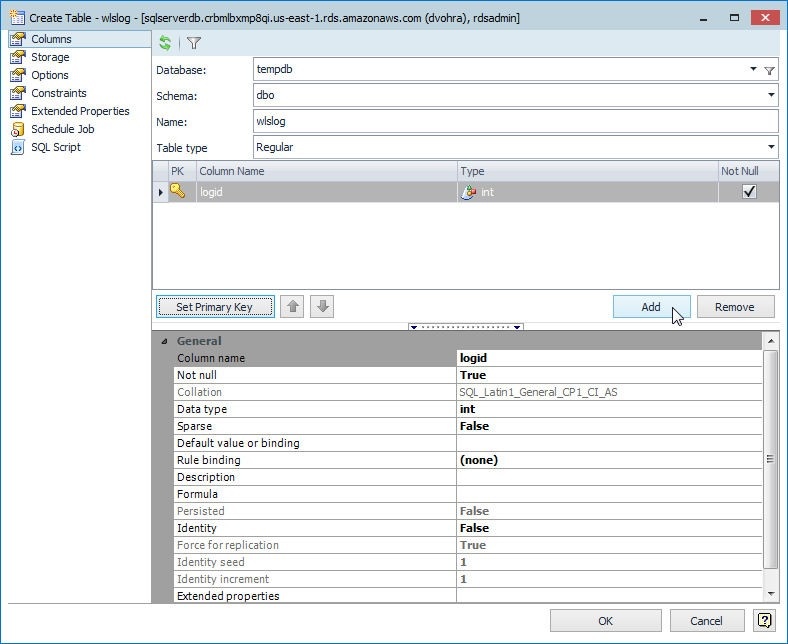
Figure 24. Create Table>Add
A new column definition gets added as shown in Figure 25.
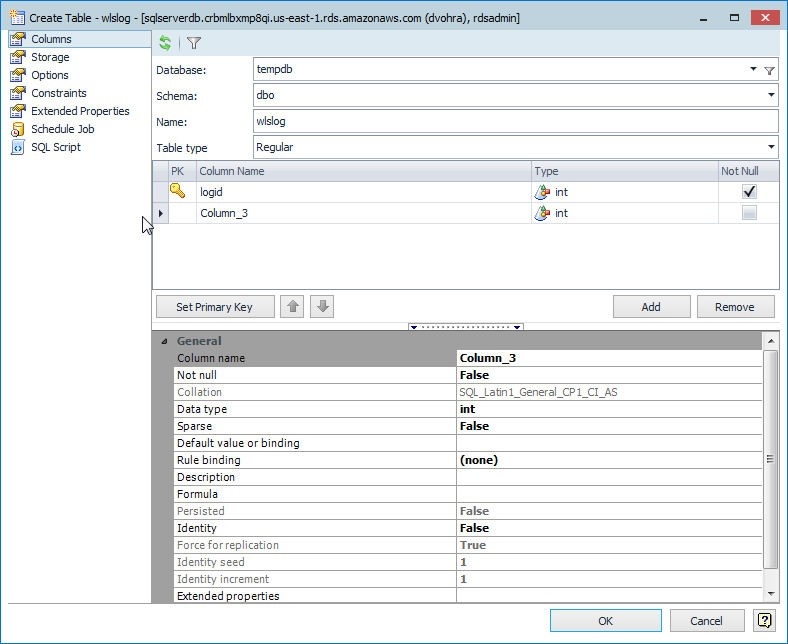
Figure 25. New Column Definition
Specify Column Name as category and select Type as varchar (50) as shown in Figure 26.
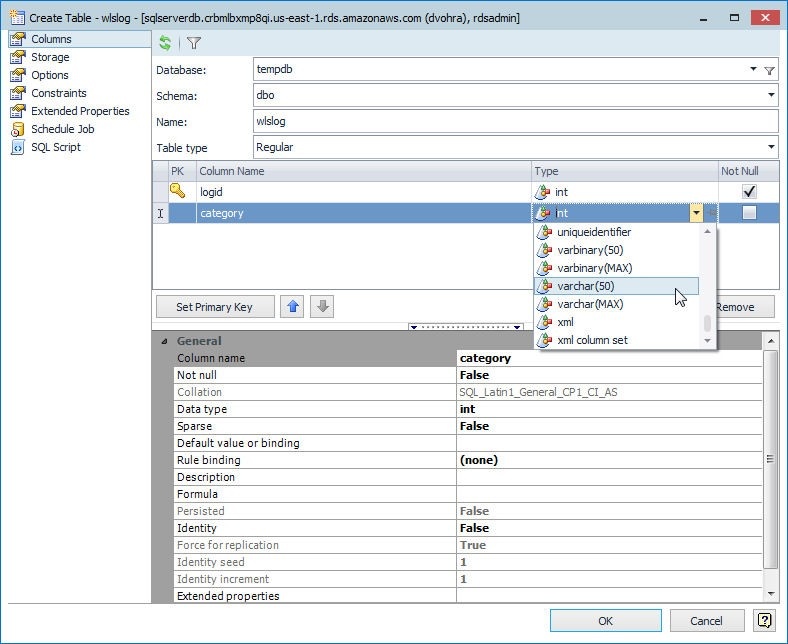
Figure 26. Adding a Column and selecting a Column Type
Click on Add to add each new column. When all the columns definitions have been added click on OK as shown in Figure 27.
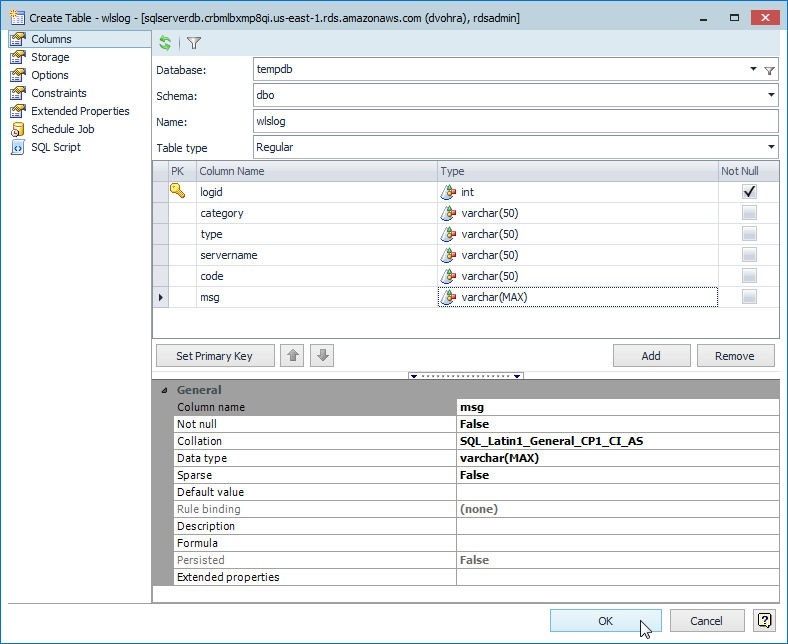
Figure 27. Create Table>OK
A message dialog gets displayed to indicate Table successfully created, as shown in Figure 28.
Figure 28. Table successfully created
A table dbo.wlslog gets added in Object Explorer>Tables, as shown in Figure 29.
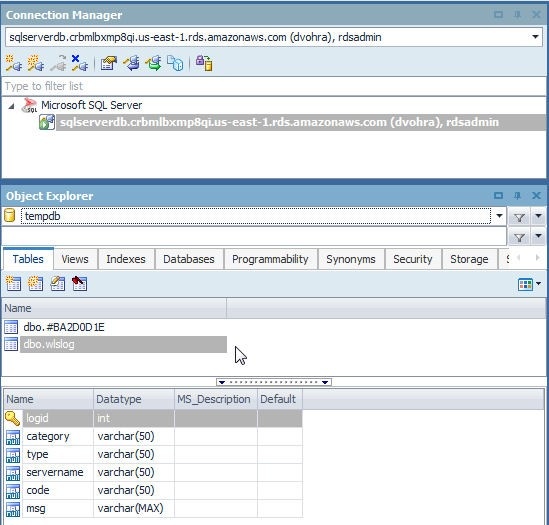
Figure 29. Table dbo.wlslog Created
Right-click on the table to display several options for the table, including Create Table, Create Table Like, Alter Table, Drop Table, Edit Permissions, Rename Table, Data Compare, Schema Compare, SQL Script, Version Control, and Generate SQL to list a few, as shown in Figure 30.
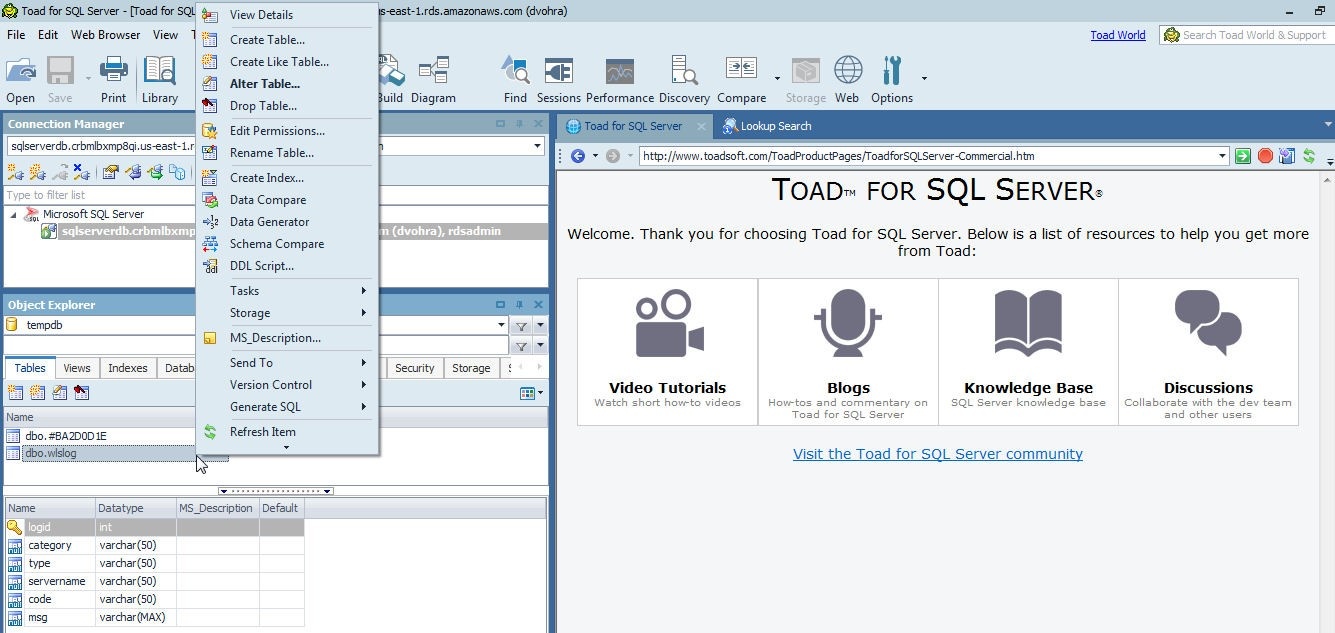
Figure 30. Table Options
Right-click on a column to display several options for a column including Alter Columns, Rename Columns, Create Index, and View Column Data as shown in Figure 31.
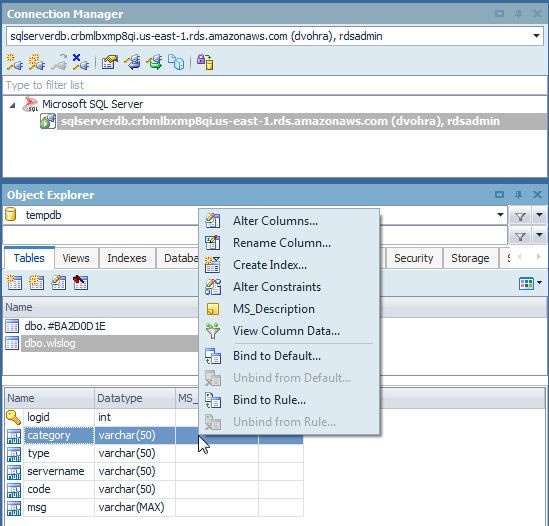
Figure 31. Column Options
Adding Table Data
Next, we shall add data to the table created using a SQL Editor. Select the db0.wlslog table and click on the Edit SQL button as shown in Figure 32.
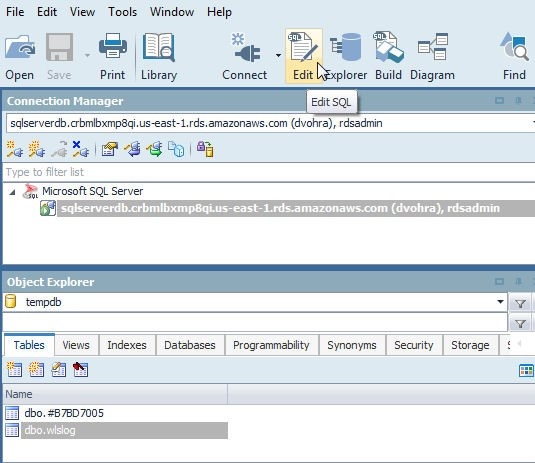
Figure 32. Edit SQL
A SQL Editor gets started, as shown in Figure 33.
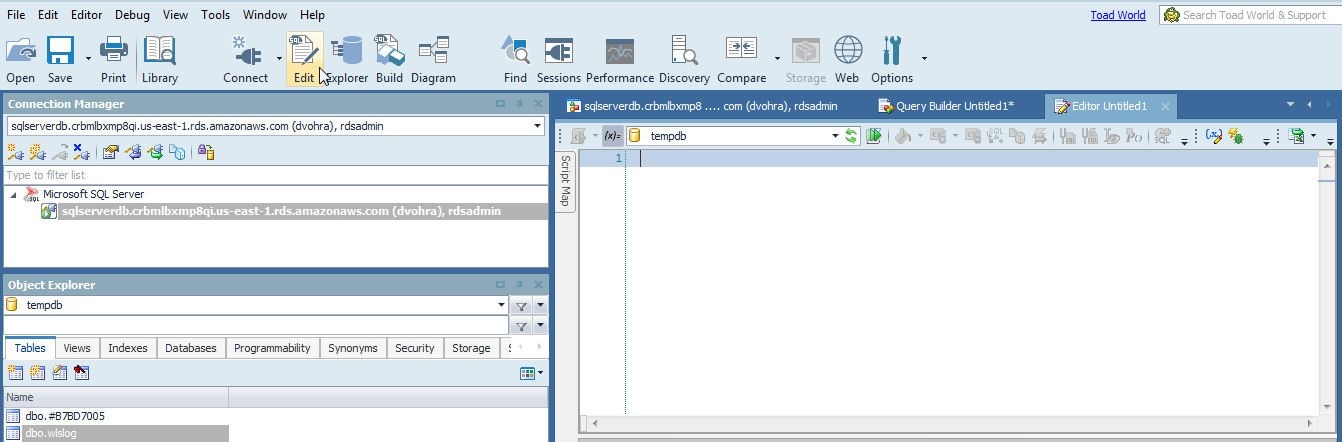
Figure 33. SQL Editor
Copy and paste the following SQL script in the SQL Editor.
INSERT INTO wlslog(logid,category,type,servername,code,msg)
VALUES(1,'Notice','WebLogicServer','AdminServer','BEA-000365','Server state changed to STANDBY');

INSERT INTO wlslog(logid,category,type,servername,code,msg)
VALUES(2,'Notice','WebLogicServer','AdminServer','BEA-000365','Server state changed to STARTING');

INSERT INTO wlslog(logid,category,type,servername,code,msg)
VALUES(3,'Notice','WebLogicServer','AdminServer','BEA-000365','Server state changed to ADMIN');

INSERT INTO wlslog(logid,category,type,servername,code,msg)
VALUES(4,'Notice','WebLogicServer','AdminServer','BEA-000365','Server state changed to RESUMING');

INSERT INTO wlslog(logid,category,type,servername,code,msg)
VALUES(5,'Notice','WebLogicServer','AdminServer','BEA-000361','Started WebLogic AdminServer');

INSERT INTO wlslog(logid,category,type,servername,code,msg)
VALUES(6,'Notice','WebLogicServer','AdminServer','BEA-000365','Server state changed to RUNNING');

INSERT INTO wlslog(logid,category,type,servername,code,msg)
VALUES(7,'Notice','WebLogicServer','AdminServer','BEA-000360','Server started in RUNNING mode');
Click on Execute scripts to run the SQL statements as shown in Figure 34. Auto Commit is set to ON by default.
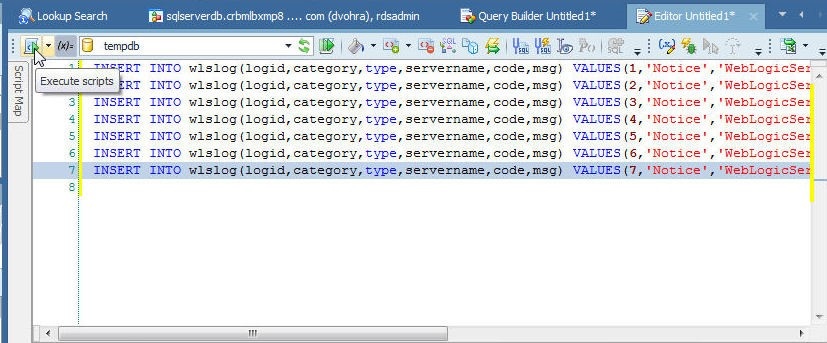
Figure 34. Running SQL Script to add Table Data
As the message in Figure 35 indicates, table data gets added and 7 rows are affected.
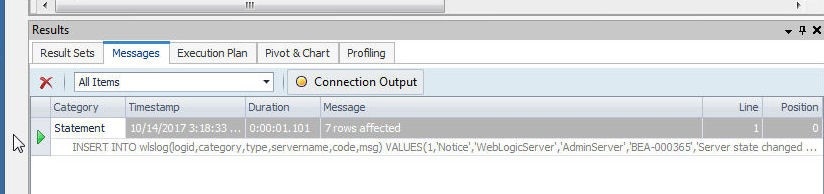
Figure 35. Messages>7 rows affected
Querying a Database Table
To query a database table, select the table in the Object Explorer and click on Build in the tool bar, as shown in Figure 36, to start a Query Builder.
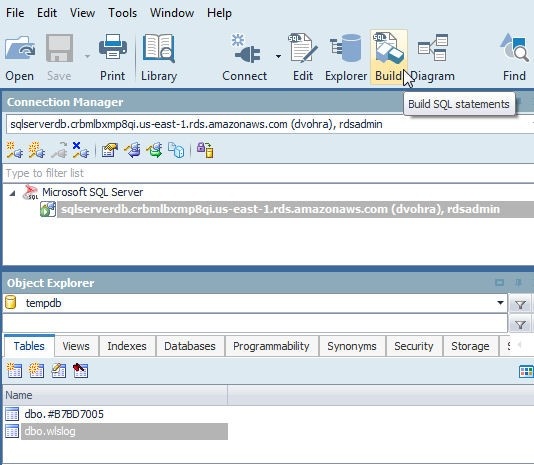
Figure 36. Build SQL Statements
A Query Builder gets started, as shown in Figure 37.
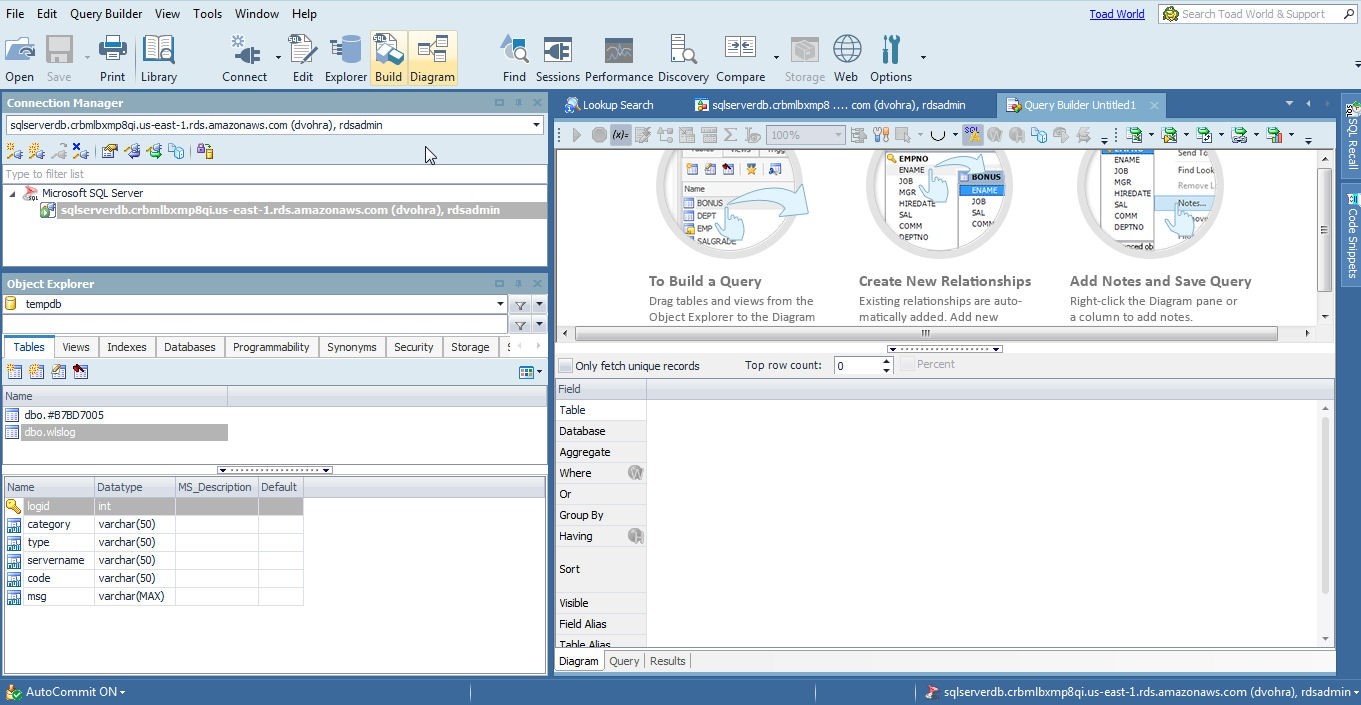
Figure 37. Query Builder
Select the table for which a query is to be generated, as shown in Figure 38.
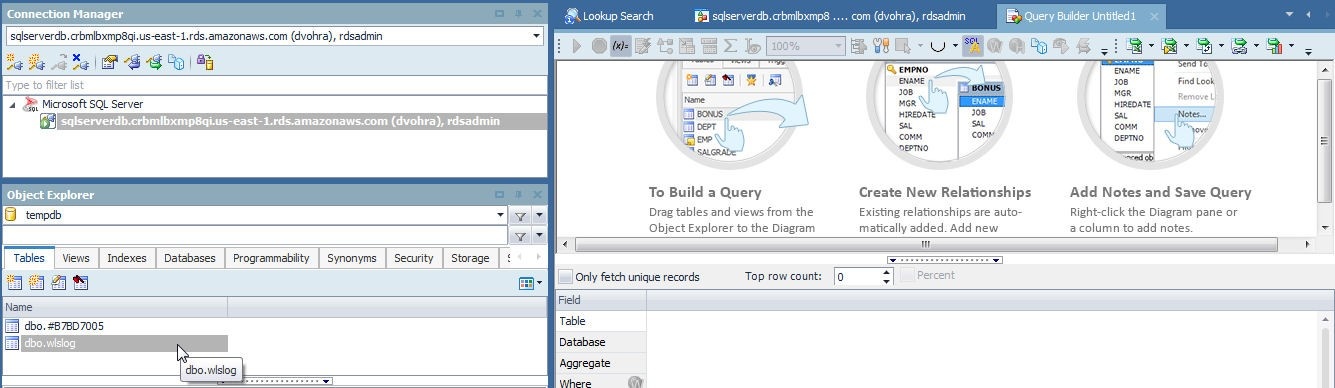
Figure 38. Selecting a Table for Query
Drag and drop the table to the Query Builder as shown in Figure 39.
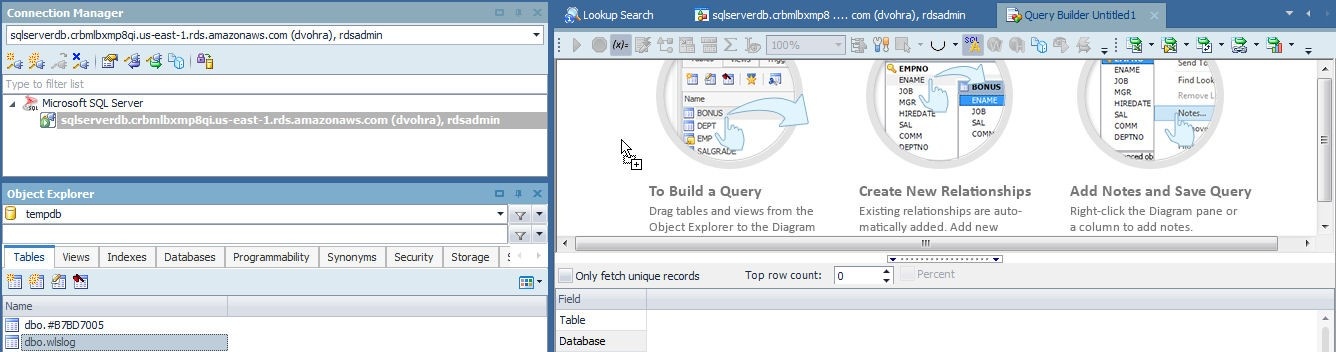
Figure 39. Adding Table to Query Builder
A diagram gets generated for the table, as shown in Figure 40. Select the columns to add to the query. Click on Add All Columns, as shown in Figure 40, to add all columns.
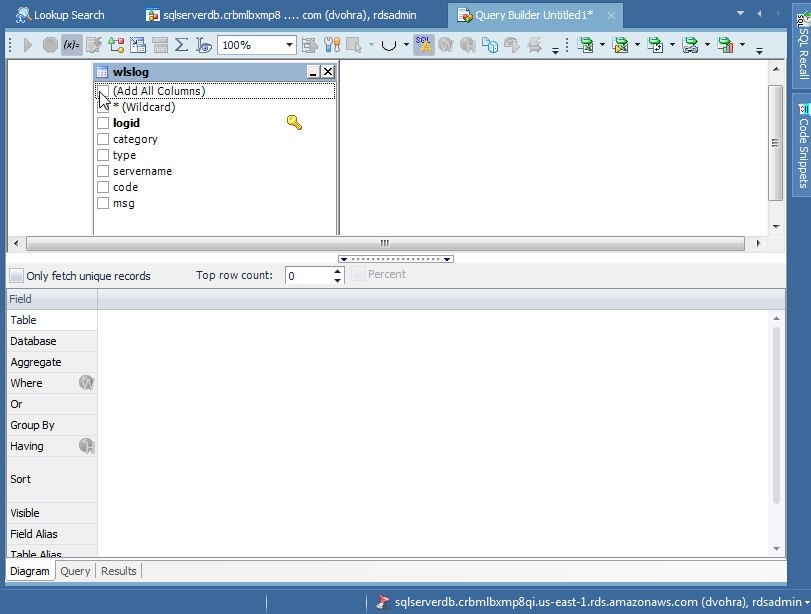
Figure 40. Table Diagram
All columns get added, as shown in Figure 41.
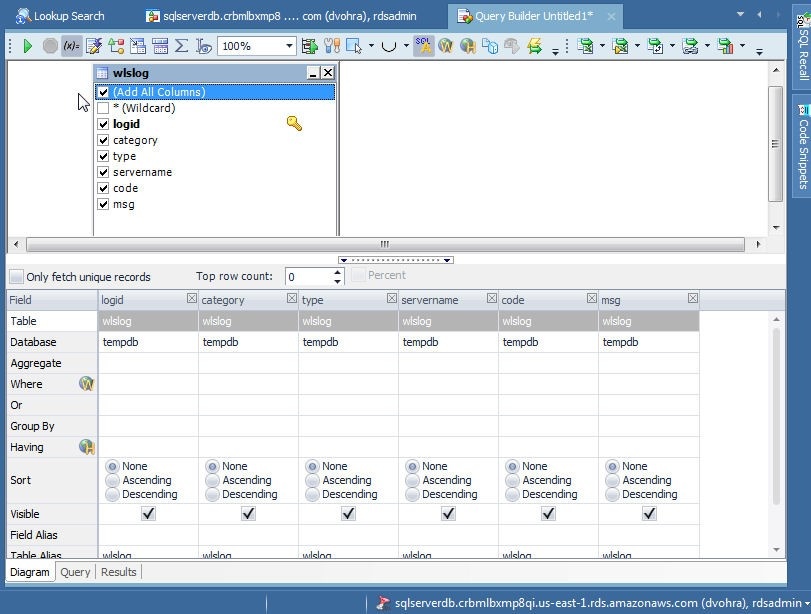
Figure 41. Selecting all Columns
Click on Execute the SQL statement as shown in Figure 42.
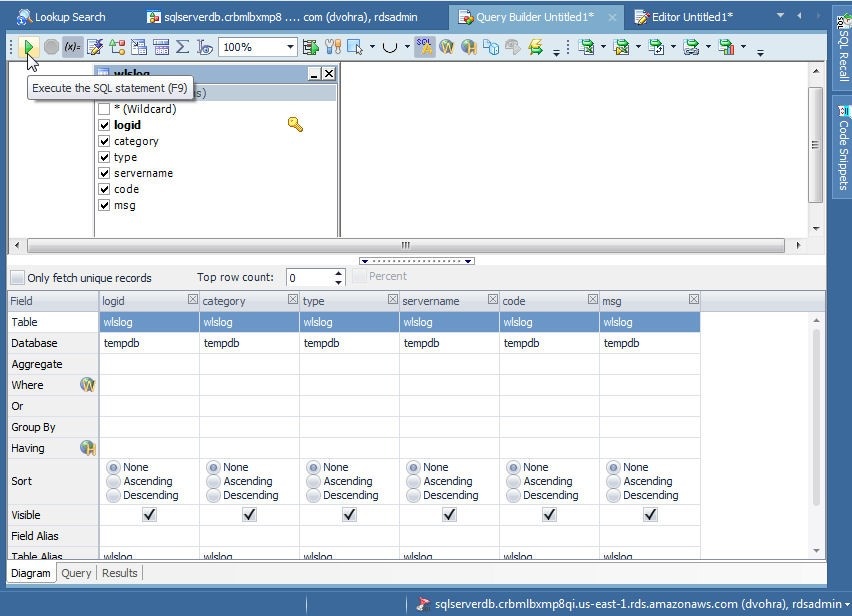
Figure 42. Execute the SQL statement
A result set gets generated for the query, as shown in Figure 43.
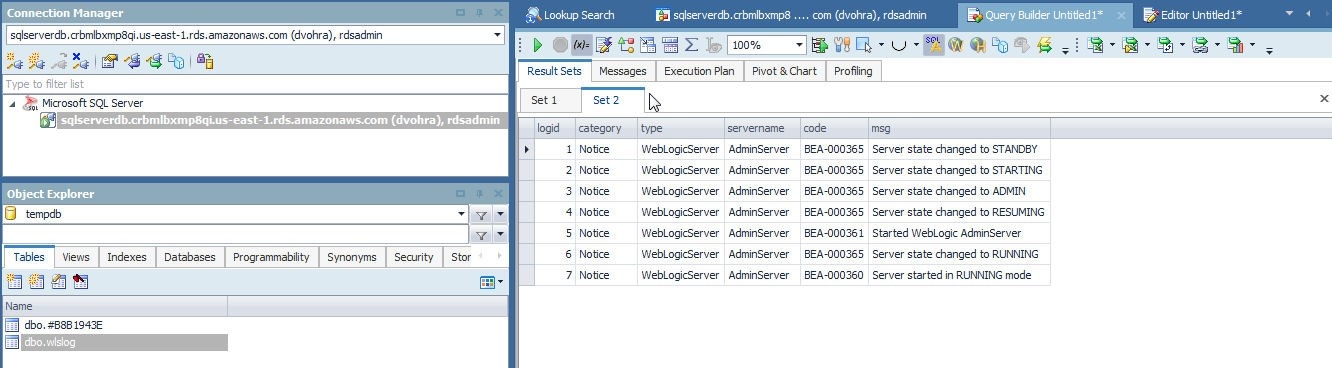
Figure 43. Result Set for Query
The Messages tab indicates Query OK, as shown in Figure 44.
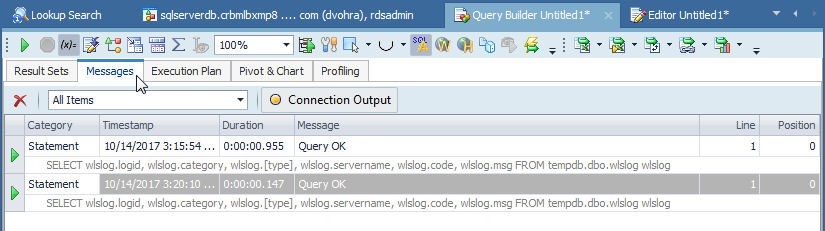
Figure 44. Query OK
Exploring a Database
To explore the database objects click on Explorer as shown in Figure 45.
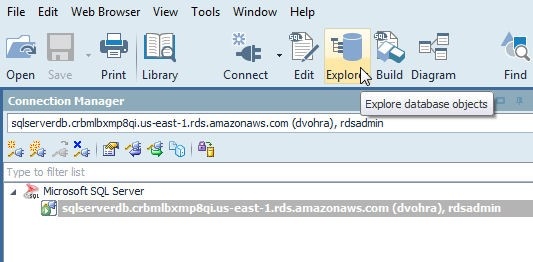
Figure 45. Explore Database Objects
The database explorer gets launched, as shown in Figure 46. Different tabs are provided for the different database objects. The Columns tab displays the columns.
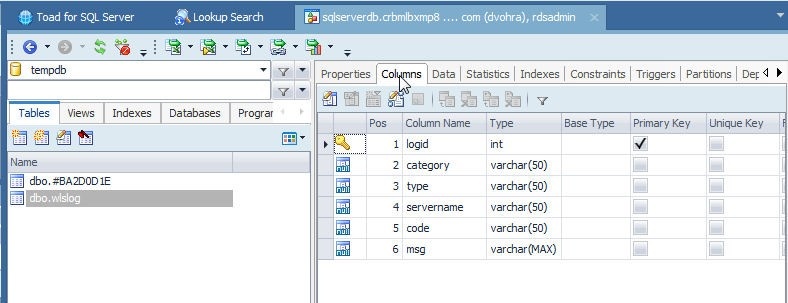
Figure 46. Database Explorer
The Data tab displays the table data, as shown in Figure 47. Initially, when table data has not been added, the Data tab does not display any data.
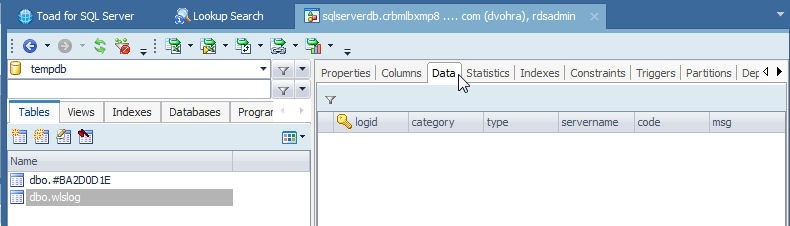
Figure 47. Table Data
Several options are provided to display data, including Sort Ascending/Descending, Group by This Column, and Best Fit, as shown in Figure 48.
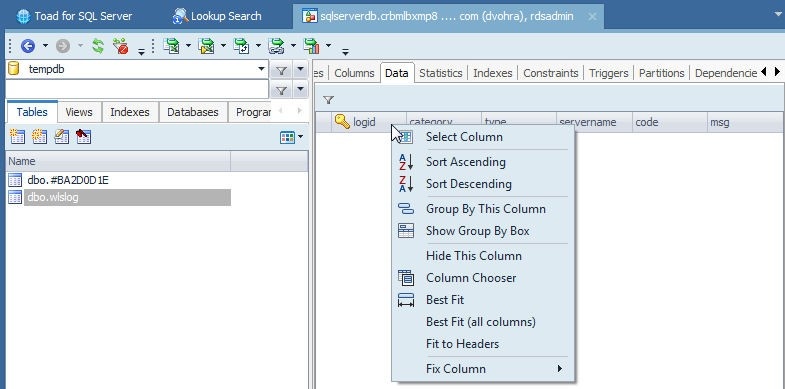
Figure 48. Options to display Data
The Constraints tab displays the primary key and other constraints, if any, as shown in Figure 49.
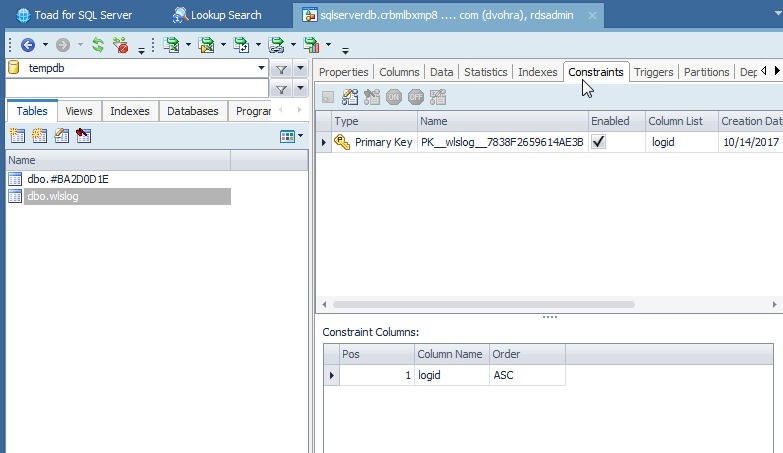
Figure 49. Constraints
After adding table data, click on the Refresh button as shown in Figure 50.
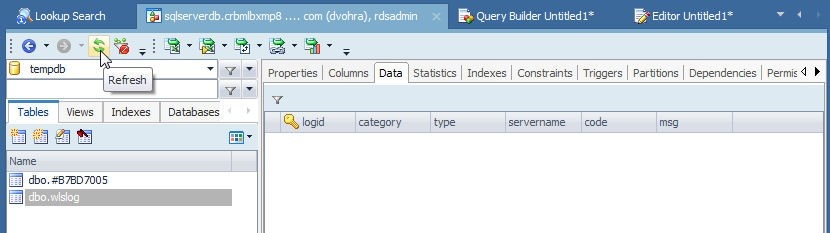
Figure 50. Data>Refresh
The table data gets displayed, as shown in Figure 51.
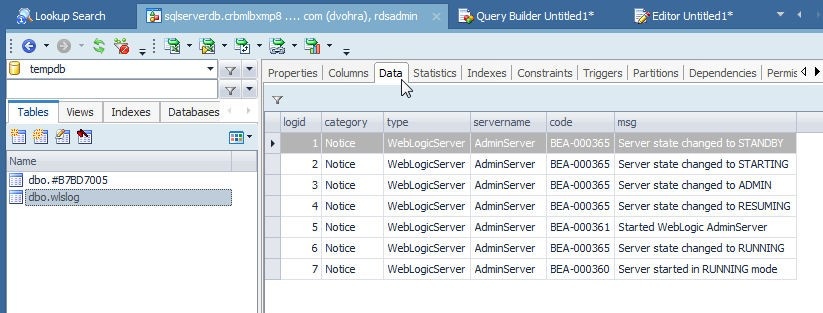
Figure 51. Table Data displayed
Dropping a Database Table
To drop a table right-click on the table in the Object Explorer and select Drop Table as shown in Figure 52.
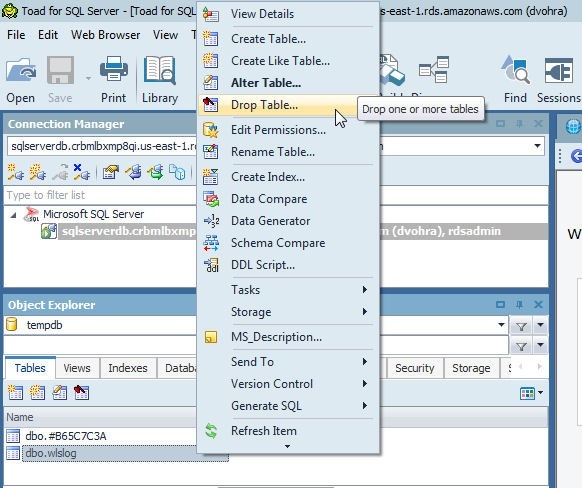
Figure 52. Drop Table…
Click on OK in the Drop Table wizard as shown in Figure 53.
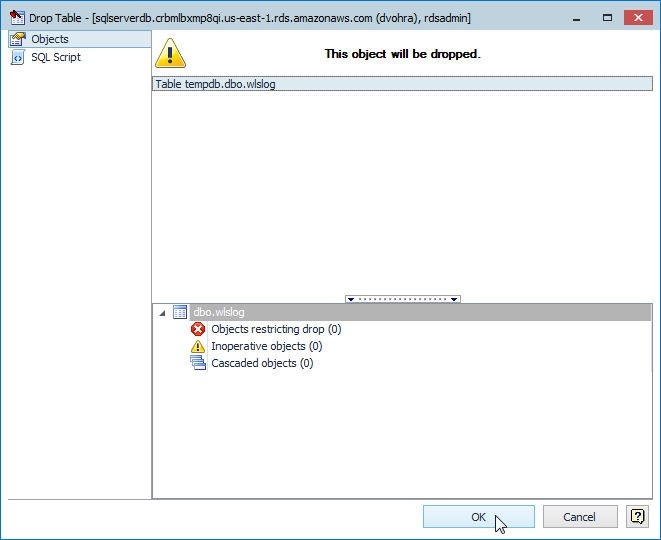
Figure 53. Drop Table wizard
The table gets dropped, as indicated by the message shown in Figure 54.
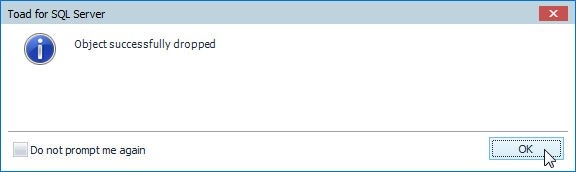
Figure 54. Table dropped
Disconnecting & Connecting with RDS
A connection may be disconnected and reconnected without having to create a new connection. To disconnect a connection, right-click on the connection node and select Disconnect as shown in Figure 55.
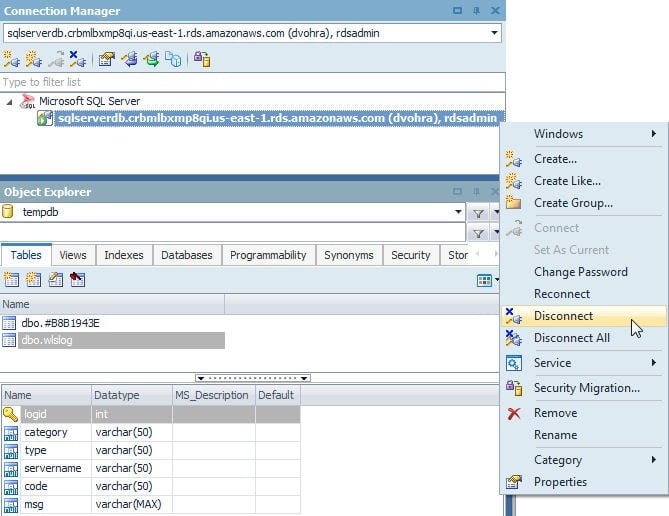
Figure 55. Disconnect
A dialog is displayed for each of the open files that need to be saved, as shown for an Untitled1 file in Figure 56. Click on No to not save the file.
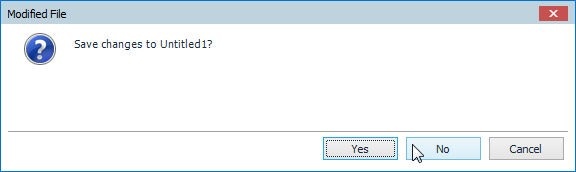
Figure 56. Modified File
The connection gets disconnected, as shown in Figure 57. The icon for a disconnected connection is different from the icon for a connected connection.
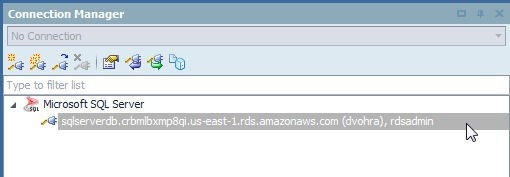
Figure 57. Disconnected connection
To connect the connection, right-click on the connection node and select Connect as shown in Figure 58.
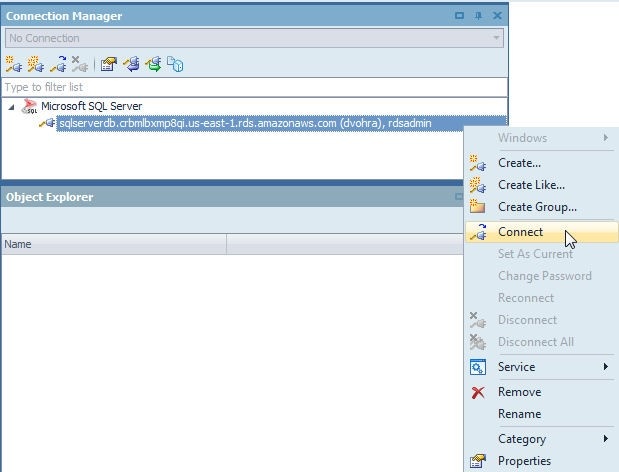
Figure 58. Connect
The Need More Information to Connect dialog gets displayed, as shown in Figure 59.
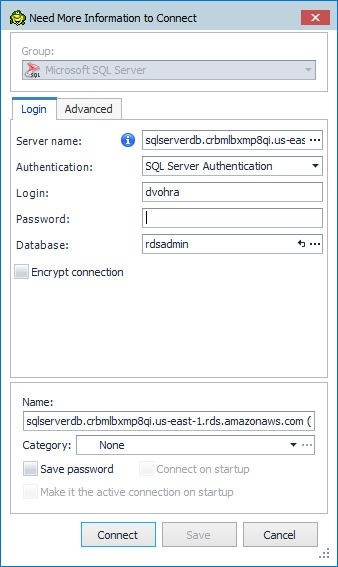
Figure 59. Need More Information to Connect
If a different database than the rdasadmin needs to be selected, click on the button for the Database field as shown in Figure 60.
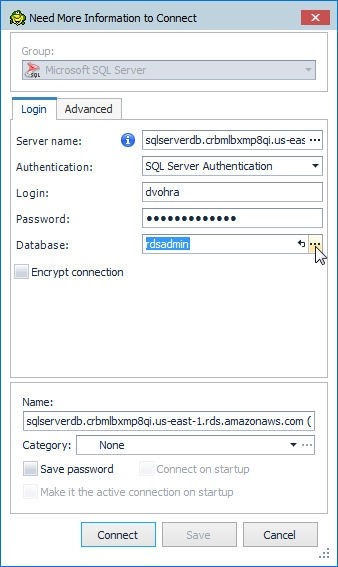
Figure 60. Database> …
Select the tempdb database as shown in Figure 61.
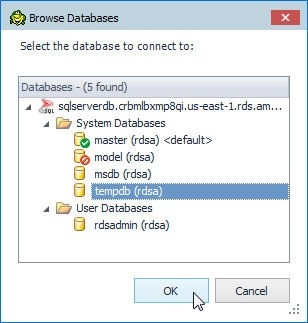
Figure 61. Selecting the tempdb Database
Select a different Category if required; Development, for example, as shown in Figure 62.
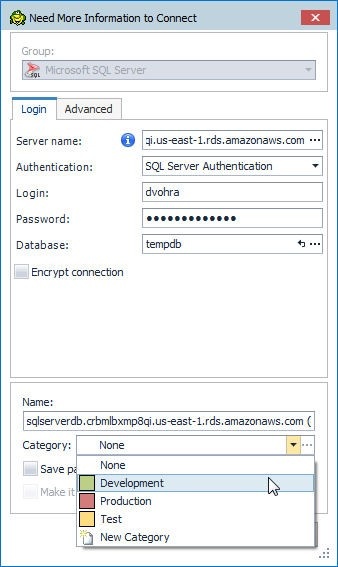
Figure 62. Selecting a Category
Click on Connect as shown in Figure 63.
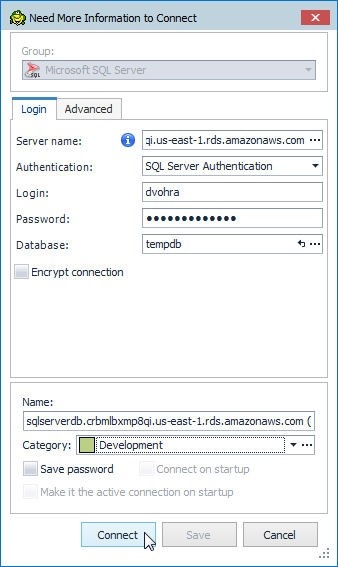
Figure 63. New More Information to Connect>Connect
The connection gets connected, as shown in Figure 64.
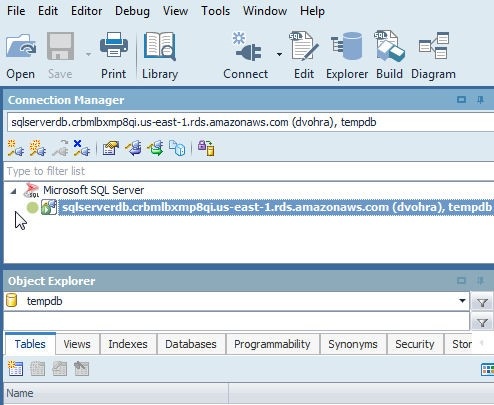
Figure 64. Connection Connected
Removing a Connection
To remove a connection right-click on the connection in Connection Manager and select Remove as shown in Figure 65.
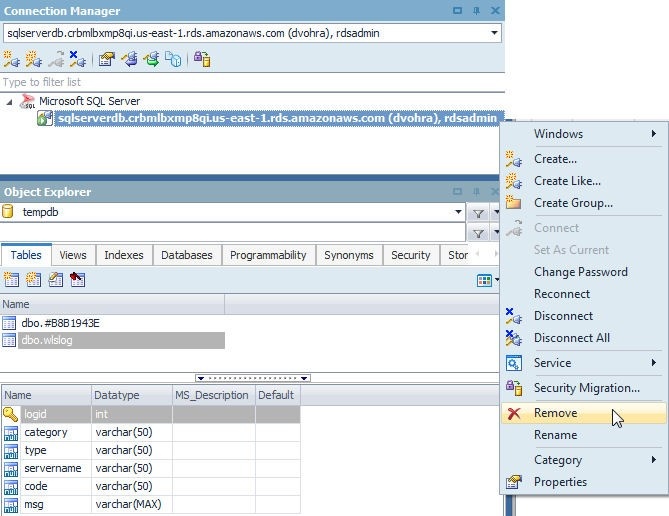
Figure 65. Remove
In the confirmation dialog click on Yes as shown in Figure 66.
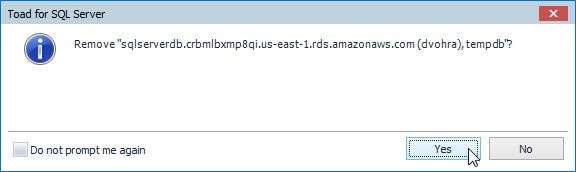
Figure 66. Removing a Connection
Another dialog Cancel active queries asks if all running queries should be cancelled, as shown in Figure 67. Click on Yes to cancel all running queries.
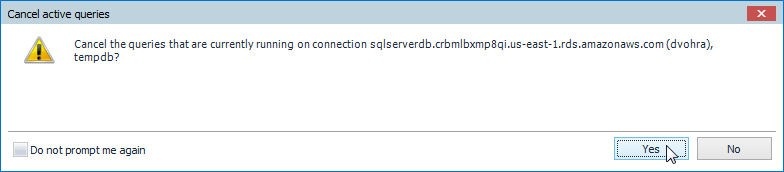
Figure 67. Cancel active queries
The connection gets removed, as shown in Figure 68.
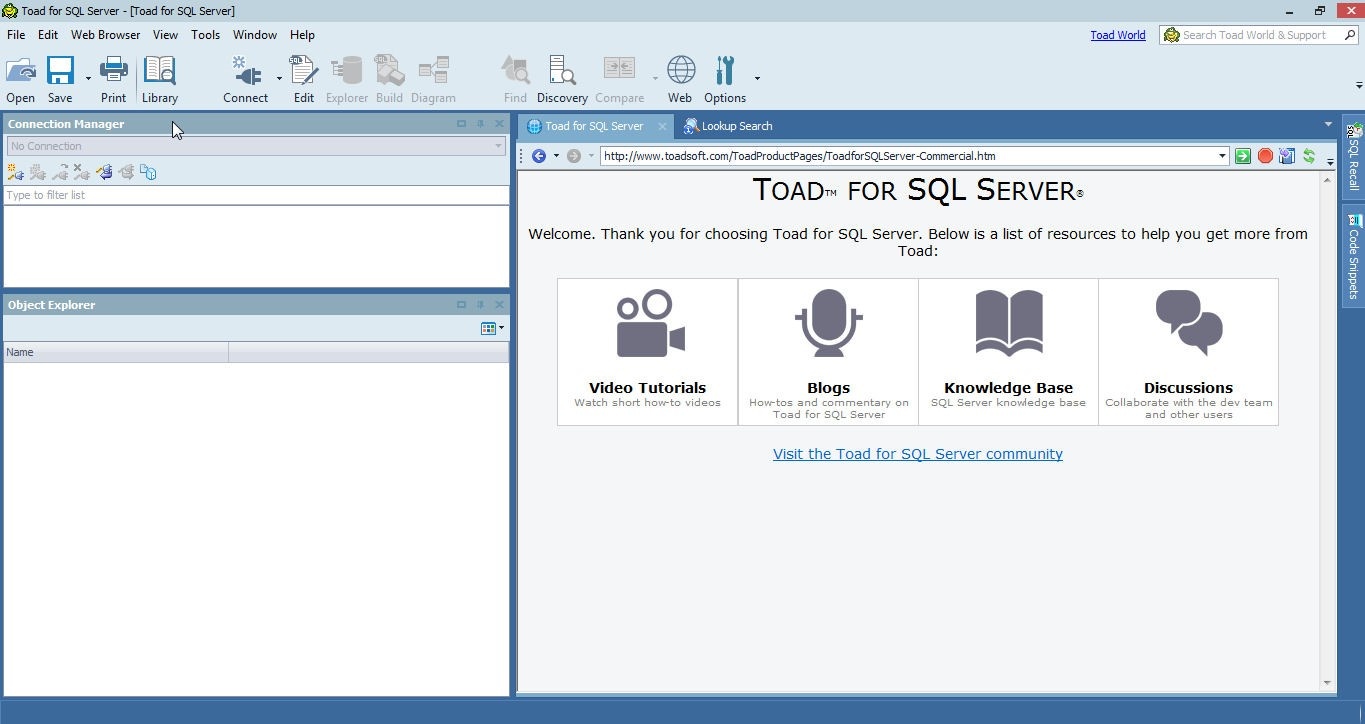
Figure 68. Connection Removed
Conclusion
In this article we discussed using Toad for SQL Server with SQL Server on AWS RDS. Toad for SQL Server provides an easy-to-use development and administration environment for accessing and using SQL Server.
Try Toad for SQL Server nowAre you just starting your journey to evaluate if you should purchase the Toad for SQL Server management tool? If you’re not quite ready to buy, we’re so sure you’ll love Toad for SQL Server, that we’re offering a Toad for SQL Server free 30-day trial. Already in a trial? Buy it now or contact sales. |
Not ready for a free trial? Learn more.
Use the links below to learn how you can use the Toad for SQL Server management tool to resolve issues, manage change and promote the highest levels of code quality, performance and scalability.
Product page: Toad for SQL Server
Tech brief: Solving the SQL Tuning Problem: Secrets of Quest SQL Optimizer
Case study: County enhances critical services for citizens with Toad®
Related blog posts:
Read more Toad World® blog posts on Toad for SQL Server.
Side note: ApexSQL adds to Quest SQL solutions
As an aside, since you’re managing SQL Server, did you know that ApexSQL is now a part of Quest? ApexSQL joined Quest this summer. We’re excited to nod our heads that yes, the ApexSQL portfolio enhances Quest’s already robust set of SQL Server management tools. Make sure to visit ApexSQL.
Got questions?
If you have any questions, please post questions to the Toad for SQL Server forum on Toad World.
Start the discussion at forums.toadworld.com