In this article series, we are looking at the steps for setting up the Oracle Hybrid Cloud via the latest version – Enterprise Manager Cloud Control 13c installed on premises. The main intention is to install an Enterprise Manager Hybrid Cloud agent on our database cloud servers via the hybrid gateway, in the scenario where our company has databases running on premises as well as on the Oracle Public cloud.
In the previous parts of the article series here, first of all we completed the pre-setup steps for the Hybrid cloud – such as setting up one of our on-premises Enterprise Manager Oracle Management Service (OMS) agents as the hybrid gateway agent, creating SSH keys for the OMS server, and creating a named credential with SSH key credentials for the hybrid cloud.
At the same time we also created an Oracle Database Service (a server with an Oracle database) on the Oracle public cloud, and copied the OMS server public key to the authorized_keys file on our Oracle Public Cloud database server.
Next, we started the installation of the Hybrid Cloud agent via Oracle Enterprise Manager. For the installation base directory for the agent, we adhered to cloud database standards and placed this directory under /u01/app/oracle/product – this is the directory where other Oracle database software had been installed at the time the OPC database server was created. As the named credential, we selected “NC_OPC_DBCS” which uses SSH key credentials; this credential had been pre-created with the SSH private and public keys of the OMS server.
We also made sure that we expanded the Optional Details section, and ticked “Configure Hybrid Cloud Agent”. When selecting the Hybrid Cloud gateway agent, the previously registered gateway agent (registered as such in one of the pre-setup steps) was picked. We then started with the “Deploy Agent” process.
The initialization of the agent included remote validations (a check to see if enough space is available, etc.) and a background transfer of the agent software to the destination host. While the transfer and deployment of the hybrid cloud agent was in progress, we monitored the installation on the OPC database server. The agent deployment proceeded, and was successful (Figure 10).
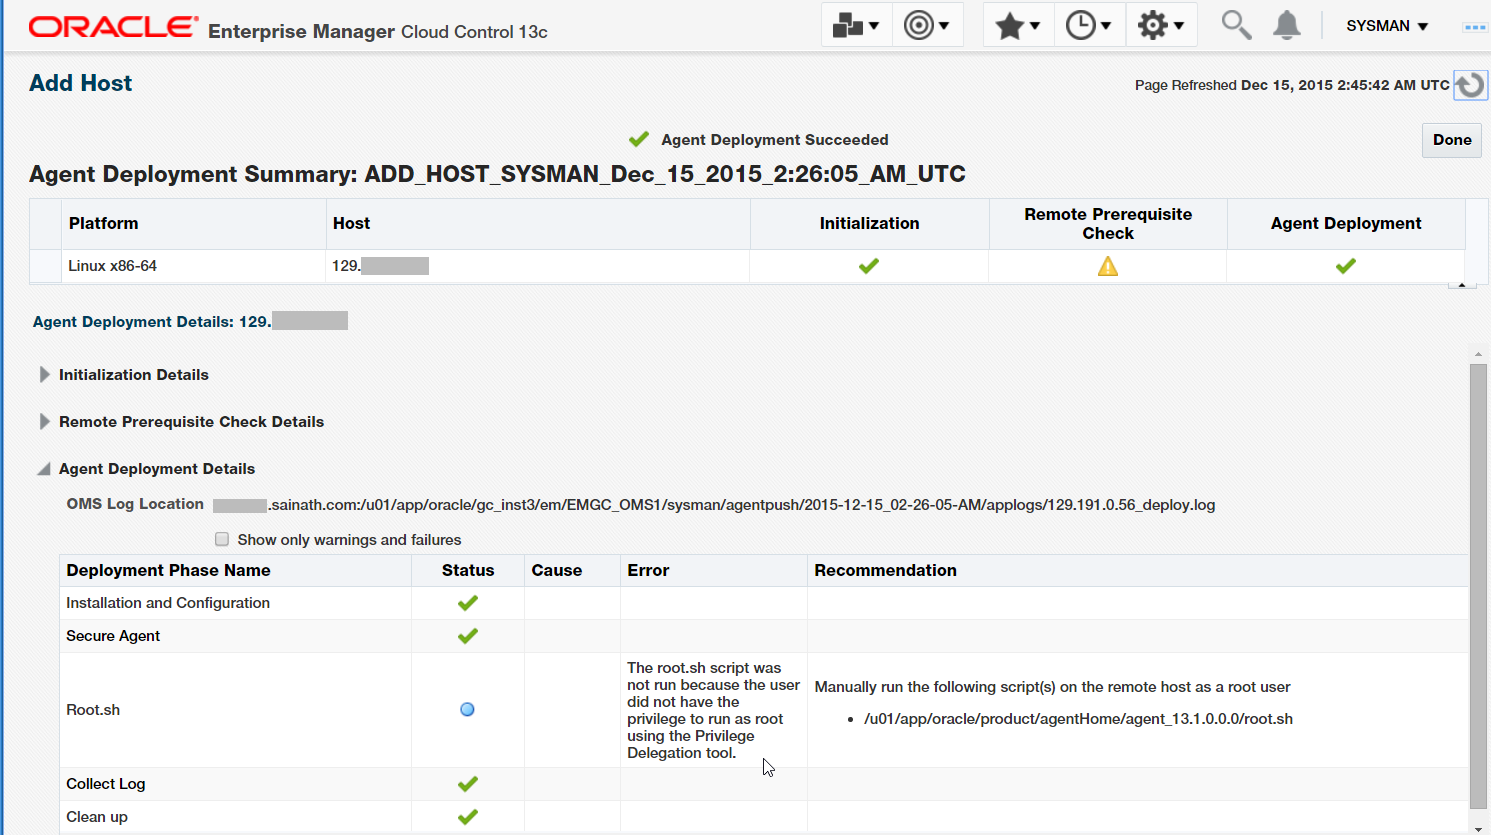
Figure 10: Successful Agent Deployment
We now continue with testing the hybrid cloud capability. As per the displayed message, you are required to run the root.sh script file manually. You can use PuTTy to do this.
Login as the “opc” UNIX user to the cloud database server, and then “sudo –s” to root. Change to the agent home directory that was mentioned in Figure 10, and run the root.sh script. Note that this is important for proper agent functioning.
You can also SSH to the Oracle Public Cloud server from the OMS server, and check the status of the agent as follows:
$ ssh <IP Address of OPC Server>
Authorized uses only. All activity may be monitored and reported.
On the Cloud server, check where the hybrid cloud agent has been installed by examining the contents of the “/etc/oragchomelist” file. This file has the directory locations of the agent home.
[oracle@AHUTESTSERVER ~]$ cat /etc/oragchomelist
 /u01/app/oracle/product/agentHome/agent_13.1.0.0.0:/u01/app/oracle/product/agentHome/agent_inst
The first directory in the list is the agent home. Move to the “bin” subdirectory under this home:
[oracle@AHUTESTSERVER ~]$ cd /u01/app/oracle/product/agentHome/agent_13.1.0.0.0/bin
From this subdirectory, check the status of the agent via the following command:
[oracle@AHUTESTSERVER bin]$ ./emctl status agent
Oracle Enterprise Manager Cloud Control 13c Release 1
Copyright (c) 1996, 2015 Oracle Corporation.  All rights reserved.
---------------------------------------------------------------
Agent Version          : 13.1.0.0.0
OMS Version            : 13.1.0.0.0
Protocol Version       : 12.1.0.1.0
Agent Home             : /u01/app/oracle/product/agentHome/agent_inst
Agent Log Directory    : /u01/app/oracle/product/agentHome/agent_inst/sysman/log
Agent Binaries         : /u01/app/oracle/product/agentHome/agent_13.1.0.0.0
Core JAR Location      : /u01/app/oracle/product/agentHome/agent_13.1.0.0.0/jlib
Agent Process ID       : 17969
Parent Process ID      : 17923
Agent URL              : https://129.xxx.x.xx:3872/emd/main/
Local Agent URL in NAT : https://129.xxx.x.xx:3872/emd/main/
Repository URL         : https://129.xxx.x.xx:1748/empbs/upload
Started at             : 2015-12-15 02:43:48
Started by user        : oracle
Operating System       : Linux version 2.6.39-400.109.1.el6uek.x86_64 (amd64)
Number of Targets      : 2
Last Reload            : (none)
Last successful upload                       : 2015-12-15 02:55:20
Last attempted upload                        : 2015-12-15 02:55:20
Total Megabytes of XML files uploaded so far : 0.22
 Number of XML files pending upload           : 0
Size of XML files pending upload(MB)         : 0
Available disk space on upload filesystem    : 28.24%
Collection Status                            : Collections enabled
Heartbeat Status                             : Ok
Last attempted heartbeat to OMS              : 2015-12-15 02:56:57
Last successful heartbeat to OMS             : 2015-12-15 02:56:57
Next scheduled heartbeat to OMS              : 2015-12-15 02:57:57
---------------------------------------------------------------
Agent is Running and Ready
The hybrid agent is up and running – and its XML files are also being uploaded via the hybrid gateway back to the on-premises Enterprise Manager repository. So everything is fine.
Discovering the Database and Listener on the Cloud Server
In the Enterprise Manager console, log in as SYSMAN or a super administrator and select Targets | Hosts. Because an agent has been installed on the cloud server, you can see the cloud server IP in the list of hosts monitored by Enterprise Manager (Figure 11). This is the line beginning with “129.” and has been masked for privacy reasons.

Figure 11: Host List
Drilling down to the Cloud host displays the Host Home Page (Figure 12). The host configuration details along with the CPU, memory, swap utilization and open incidents can be seen. Note that it appears like a normal Enterprise Manager host, except for the “Oracle Cloud” words and icon at the top left corner of the Home page.
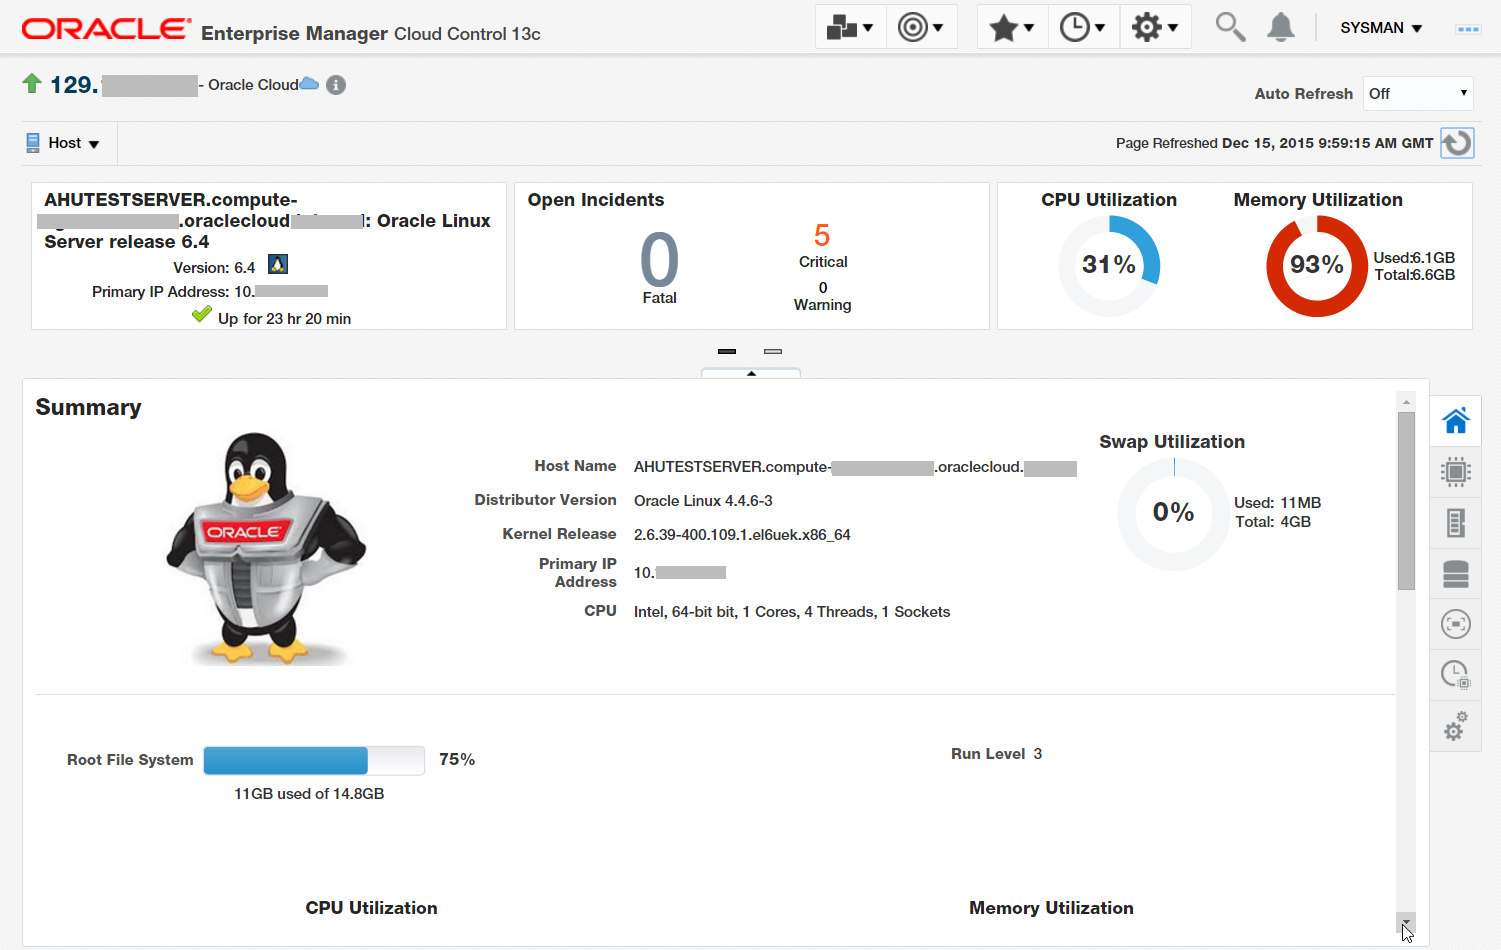
Figure 12: Cloud Host Home Page
Scroll down to see the other details of the cloud host, such as the performance details (Figure 13). Separate graphs showing the CPU utilization, memory utilization, CPU threads utilization, filesystem distributions and network usage can be seen.
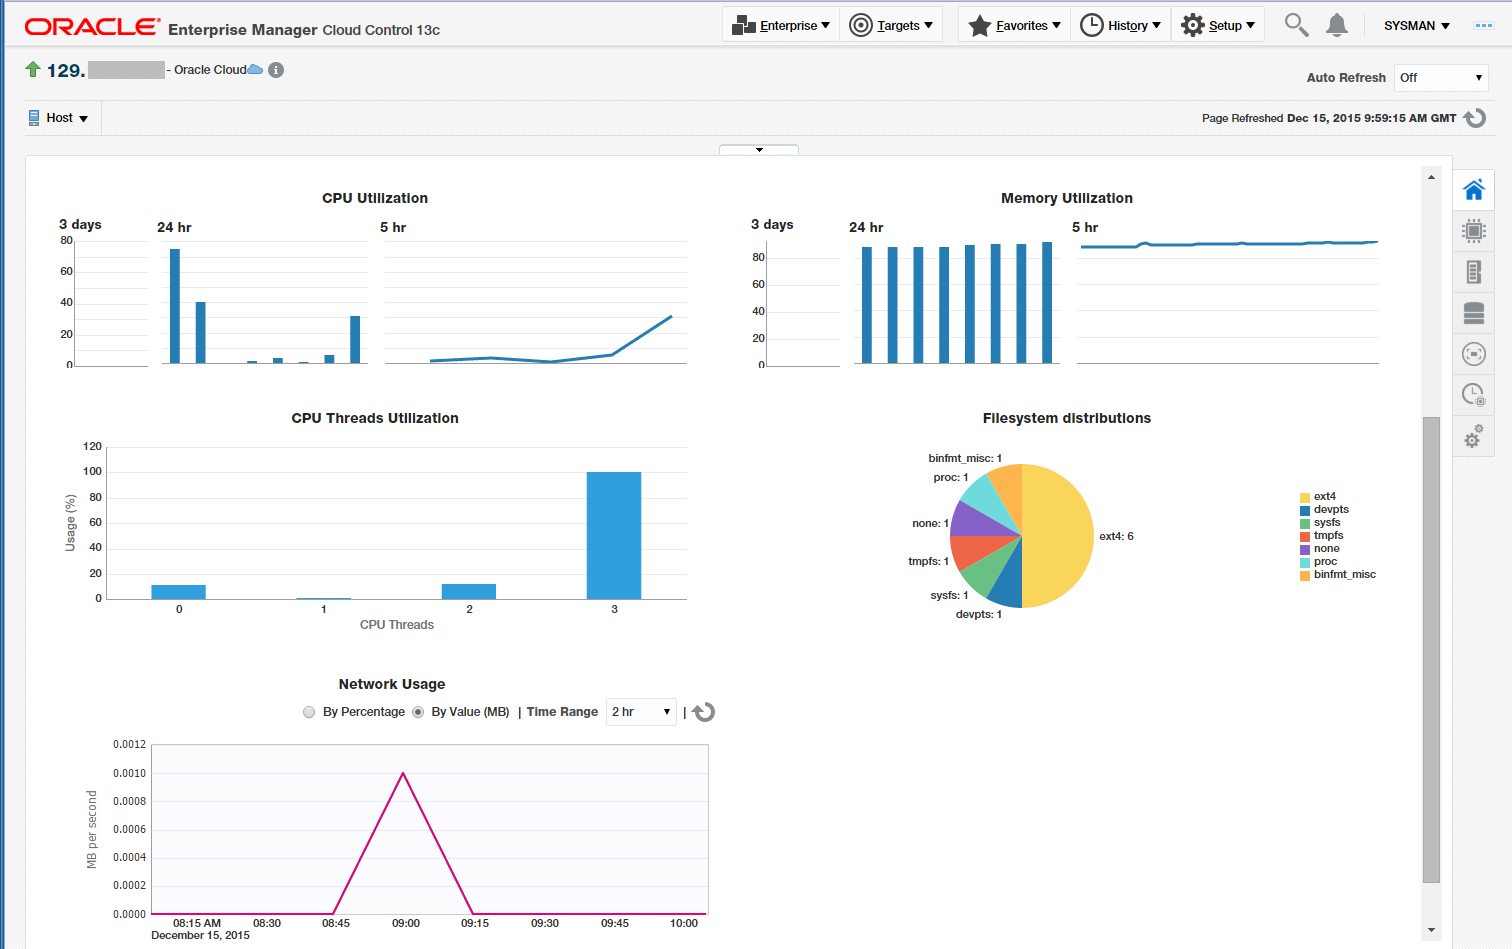
Figure 13: Performance Details of Cloud Server
Move to Targets | Databases. Currently, the cloud database has not been discovered so it is not visible in the list of databases monitored and managed by Enterprise Manager (Figure 14).
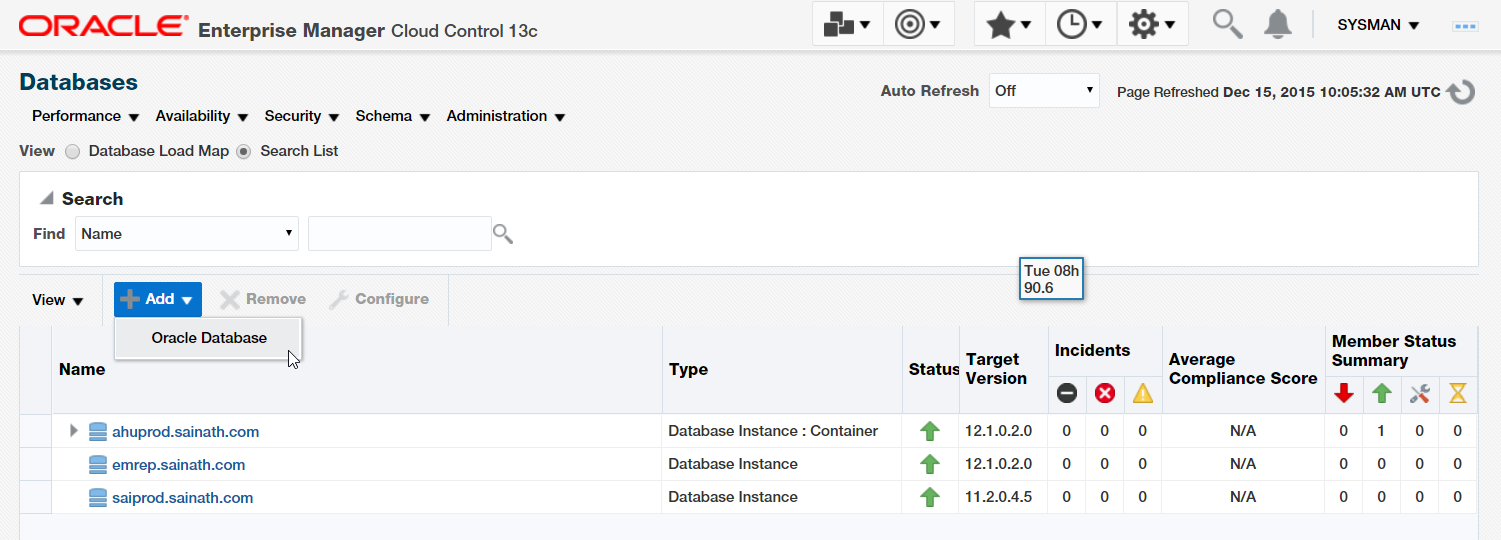
Figure 14: Adding Cloud Database
Select Add | Oracle Database from the menu. The first step of the discovery process is displayed (Figure 15).
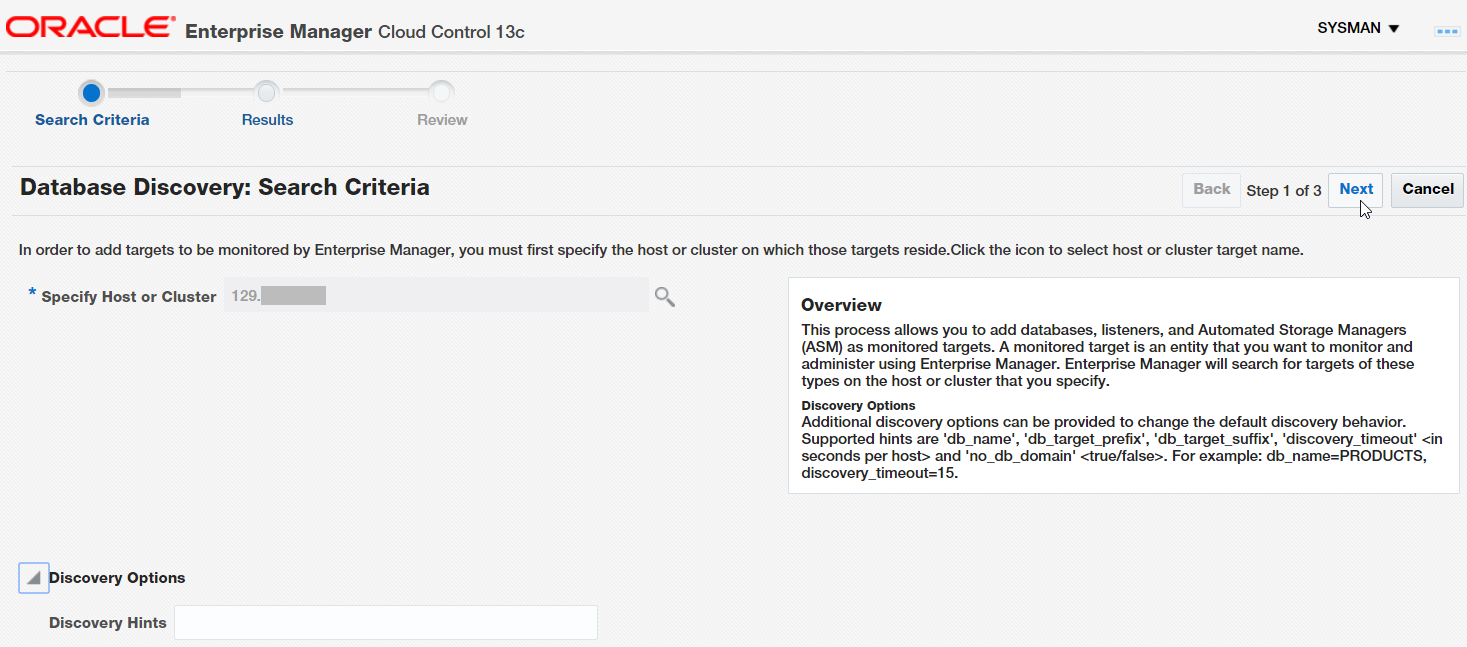
Figure 15: Database Discovery: Search Criteria
On this page, specify the IP address of the Oracle Public Cloud database server. You can also specify discovery hints as explained on the page. We will continue in the next part of the article series.
Start the discussion at forums.toadworld.com