In this article series, we are looking at the steps for setting up the Oracle Hybrid Cloud via the latest version – Enterprise Manager Cloud Control 13c. We will follow the pre-steps, and then install a Hybrid Cloud Agent via the Hybrid Gateway.
To recap, a hybrid database cloud can be used when clients may not want to use the public database cloud lock, stock, and barrel. They may want to keep their critical databases on-premises and have some test or development databases in the cloud; or perhaps some non-critical databases in the cloud. So, in this scenario they would have a number of local on-premises databases and at the same time a few public cloud databases. This then becomes a hybrid cloud – since you have multiple databases running on premises as well as on the public cloud. This is the ideal approach for many companies.
Pre-setup steps for the Hybrid cloud include setting up one of your OMS agents as the Hybrid Gateway agent, creating SSH keys for the OMS server, and creating a Named Credential with SSH key credentials for the hybrid cloud.
In the previous part of the article series here, we completed the first two pre-setup steps. We can now continue with the third step.
Pre-setup Step 3
This step is to create an Enterprise Manager Named Credential that will be used specifically with the hybrid cloud.
Log in to the Enterprise Manager console as SYSMAN or a super administrator. Select Setup | Security | Named Credentials.
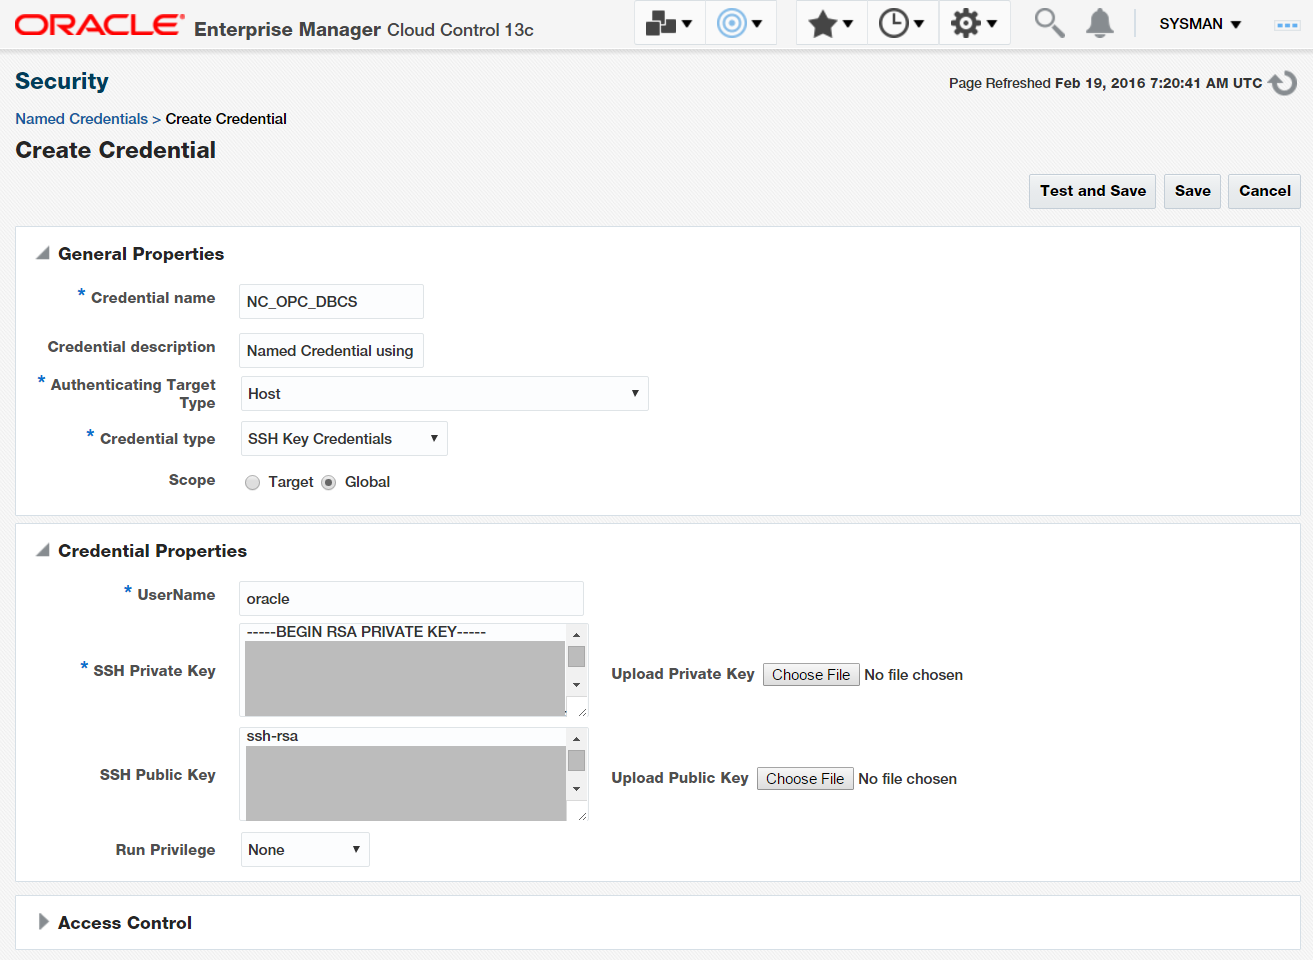
Create a Named Credential “NC_OPC_DBCS”; this should be selected with “Authenticating Target Type” as “Host”, “Credential Type” as “SSH Key Credentials”, and “Scope” as “Global”.
If “SSH Key Credentials” do not appear in the drop-down list of Credential Type, then you need to run the workaround listed in My Oracle Support (MOS) Note 1640062.1. The workaround you can use is a PL/SQL block mentioned in the note. The PL/SQL block is to be executed as SYSMAN in the OMS repository.
On the Create Credential screen (Figure 1), in the SSH private and public key fields, cut and paste the appropriate SSH keys from the Oracle Home’s .ssh directory on the OMS server. You generated these SSH keys in the previous step.

Figure 1: Named Credential using SSH Key Credentials
Use the username “oracle”. You can also expand the Access Control section and grant access to this credential to other Enterprise Manager administrators.
At this stage, don’t test the named credential. Just save it. This is the case because, at this point of time, the cloud database server is not a managed target in Enterprise Manager and, as such, cannot be used for testing the named credential.
Pre-setup Step 4:
When running the Enterprise Manager deployment procedure “Clone to Cloud” later on in this article series, the “Secure Copy Files” step may fail with the error message "rsync: Failed to exec ssh: Permission denied (13)” in certain cases where the local OMS server has been set up with “enforcing” SELINUX security.
A quick workaround to this is to change SELINUX to “permissive” in the file /etc/selinux/config, as the root UNIX user on the OMS server:
# This file controls the state of SELinux on the system.
# SELINUX= can take one of these three values:
# enforcing – SELinux security policy is enforced.
# permissive – SELinux prints warnings instead of enforcing.
# disabled – No SELinux policy is loaded.
SELINUX=permissive
# SELINUXTYPE= can take one of these two values:
# targeted – Targeted processes are protected,
# mls – Multi Level Security protection.
SELINUXTYPE=targeted
Reboot your system after you make this change. After the reboot is completed, confirm that the root UNIX user that the getenforce command returns permissive:
# getenforce
Permissive
Note that if your company mandates that SELINUX should be set to “enforcing” for security reasons, then you will need to configure SELINUX to allow RSYNC to be executed from the agent (i.e., via script).
This is more complicated than the quick workaround above. You will need to work with your security administrator for the correct steps to set up SELINUX to allow individual commands such as RSYNC.
Other Requirements
The other requirements for the hybrid cloud are obvious. You will need an account (either trial or production) for the Oracle Public Cloud (OPC) at https://cloud.oracle.com/home, for the Database Cloud Service.
You will have created an Oracle Database Service (a server with an Oracle database) on the Oracle public cloud in advance, and it would be up and running.
You will need the IP address of this cloud database server that will be used in this Hybrid Cloud setup. You would have also set up PuTTY access from your laptop to the cloud database server.
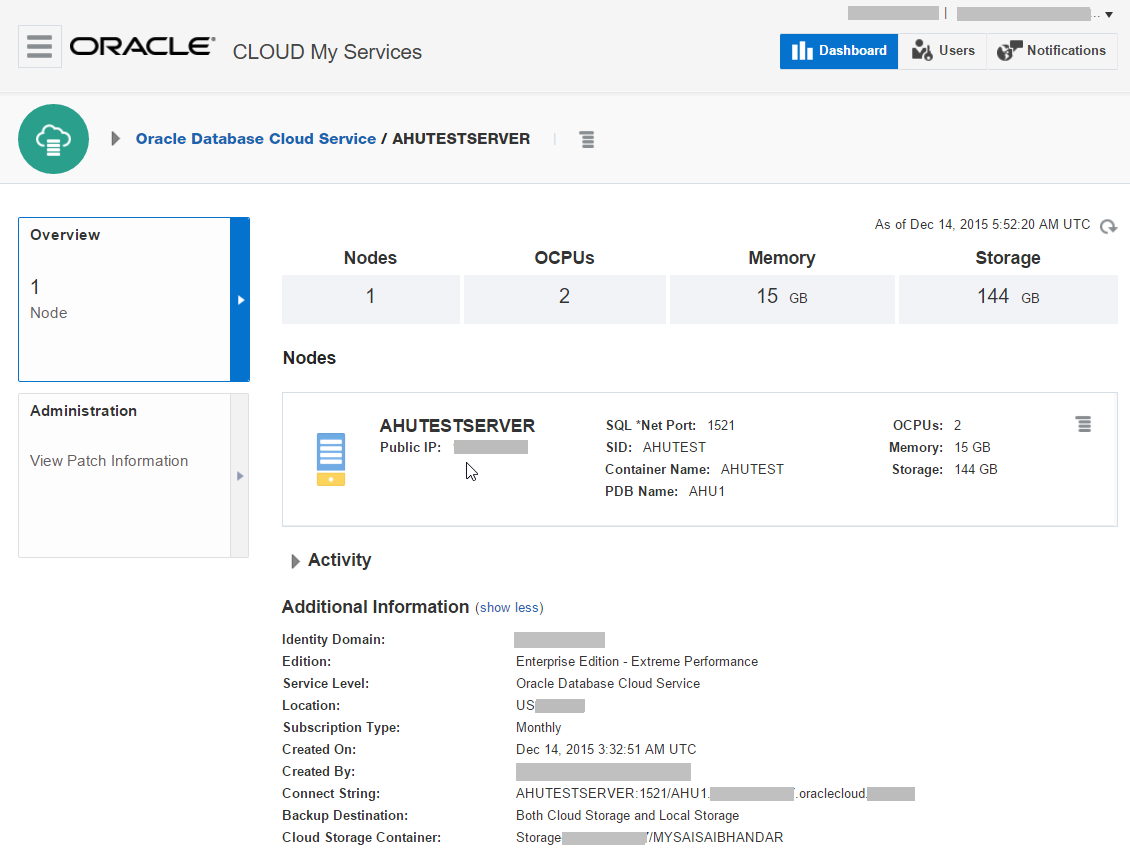
For example, the following screenshot (Figure 2) shows an Oracle Public Cloud database server “AHUTESTSERVER” that has been created. The IP address and other fields are blanked out in this screenshot for privacy reasons.

Figure 2: Oracle Public Cloud Database Server
Note that we have created the “Extreme Performance” type of Enterprise Edition database, so that the Enterprise Manager Management packs such as Diagnostics, Tuning, Database Lifecycle Management (DBLM) packs etc. can be used on the cloud database. In Figure 2, “Extreme Performance” is displayed in the Edition field.
Initial Steps
Login as the oracle UNIX user to the Enterprise Manager 13c OMS Server, and change to the .ssh directory under the oracle home:
cd .ssh
Open the file “id_rsa.pub” in this directory using vi, and copy the text to the clipboard. This is the OMS server public key. This was generated during one of the pre-setup steps earlier in this article series.
From your on-premises workstation, open an SSH session using PuTTY to the Oracle Public Cloud database server, and as the oracle UNIX user, perform these steps:
cd ~/.ssh
vi authorized_keys
In this file, paste the OMS server public key (make sure there are no line breaks), and save the file. Then from a UNIX session on the OMS server, ssh to the Oracle Public Cloud database server using the IP address, and accept the connection when asked.
You are now ready to test out the hybrid cloud capability. We will continue in the next part of this article series.
(Disclaimer: The views expressed in this article are the author’s own views and do not reflect the views of Oracle Corporation. The author has written this article as an independent, unbiased cloud architect/consultant.)
Start the discussion at forums.toadworld.com