In our article series, we are exploring the capabilities of Oracle Enterprise Manager Cloud Control 13c for the private Database as a Service (DBaaS) Cloud – including the setup of such a cloud. In the previous part here, we looked at the benefits of an on-premises private cloud as opposed to the public database cloud. We saw why companies may elect to create their own private database cloud.
Next, we noted the Oracle licenses that are required for the Oracle Private Database cloud, such as the Enterprise Manager Cloud Management pack for Oracle Database, and the underlying prerequisite Database Lifecycle Management (DBLM) pack. This of course would be in addition to the Oracle Enterprise Edition database licenses for the actual working database instances and the various associated Enterprise Edition database options, such as partitioning, advanced compression, real application clusters, advanced security, label security, multi-tenant, and so on.
The first step in the private DBaaS cloud setup is to configure the Self Service portal, which is the main gateway that the Self Service Application (SSA) user logs into, in order to request new databases on the servers in the database pool.
To enable the use of the Self Service Portal for the SSA user, certain steps need to be completed by the cloud administrator. These include the set up of the software library, creation of user privileges, creation of roles that can access the pools of database servers, creation of the PaaS Infrastructure Zones, Database Pools, specification of quotas for users, service templates, and optionally, the creation of chargeback plans. Let us go through these steps.
Set Up Software Library
As the first step, you need to configure the software library in Enterprise Manager Cloud Control 13c. This is where the database profiles and gold images are stored for the purpose of provisioning.
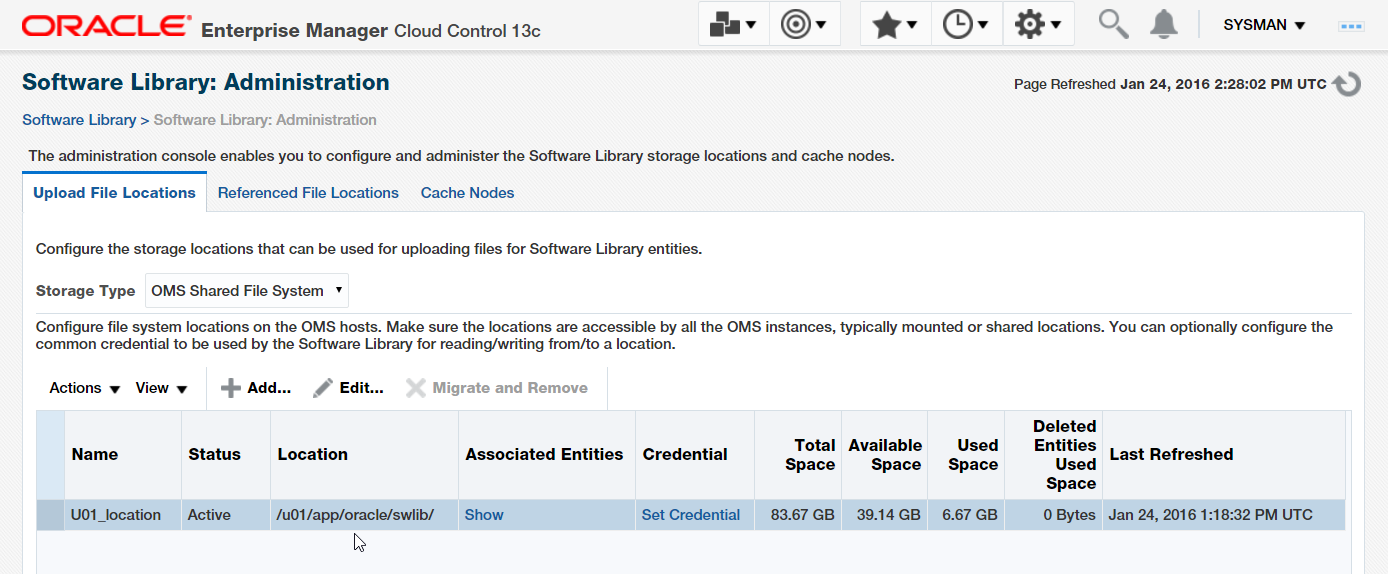
First, specify the storage location for the software library. As SYSMAN or another super administrator, select Setup (the “Gear” Icon) | Provisioning and Patching | Software Library. The following screen (Figure 1) appears.

Figure 1: Software Library Administration.
Select the “Upload File Locations” tab. Set the Storage Type as "OMS Shared Filesystem" and click on the Add button to create an Upload File Location of that type. In the scenario we are using, a location "U01_location" has been created with the directory path as shown in Figure 1.
A local directory can be used in the case of a single Oracle Management Service (OMS) Enterprise Manager system, however for multi-OMS systems, a shared file system should be utilized especially for High Availability (HA) purposes. This can be set up by using OCFS2, ACFS, or even a NAS file system. The shared file system should be accessible by all the OMS instances and highly available.
Optionally, click on “Set Credential” to configure the common credential to be used by the software library for reading/writing from/to a location.
The other option for Storage Type is “OMS Agent File System”. If you select this, you can configure file system locations on OMS hosts. These locations are then accessed by the EM13c agents monitoring the OMS hosts, primarily to read or write data using the configured credentials.
For large files that you do not want to upload to the software library and that reside on non-OMS servers, you can move to the “Referenced File Locations” tab and add storage locations that are read-only for the software library. These locations will not be used for uploading files. The storage types in this case are HTTP, NFS or Agent.
Note that from Enterprise Manager 12.1.0.4 onwards, the software library is configured by the administrator who performs the installation of Enterprise Manager, so you may not need to configure it separately. But be sure to check the details of how it is set up, using the steps mentioned above.
Set Up Self Update
The next step is to set up the Enterprise Manager Self Update system, whereby you can download the latest plugins from the external Enterprise Manager store. This can either be done online (recommended) or offline, depending on your company policy.
Why is online mode recommended? You need it for optimal usability. In online mode, Enterprise Manager connects to My Oracle Support to download patches, get the latest health checks, download self-updates, etc. Note that this is a one-way connection; no outside services can connect to Enterprise Manager. Also, no customer data is sent from Enterprise Manager to Oracle.
If you are using online mode, then the OMS server needs to be connected to the Internet, either directly or via a company proxy. The proxy can be selected via Settings | Proxy Settings | My Oracle Support. The following screen (Figure 2) appears.

Figure 2: Proxy Settings for My Oracle Support
You can Test the settings, and then click on the Apply button.
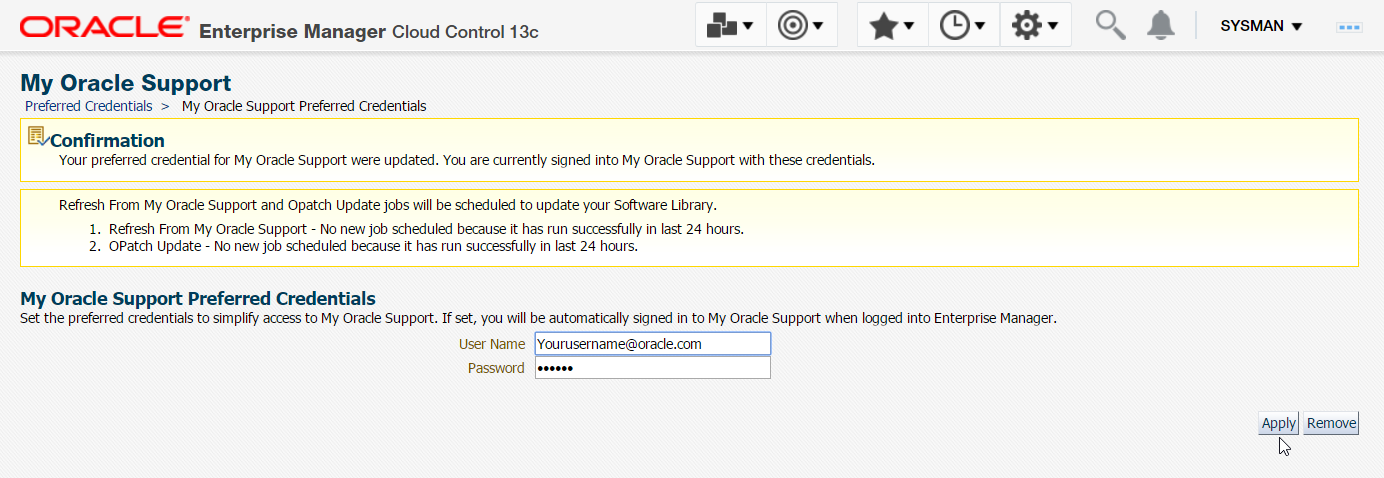
Next, set up the My Oracle Support (MOS) Credentials. This is required if you will be using online mode for the self-update of plugins.
Do this as SYSMAN. Select Setup | My Oracle Support | Set Credentials. This is seen in Figure 3 below.

Figure 3: Preferred Credentials for My Oracle Support
When you update the Credentials, and if the Credentials are correct, then the Enterprise Manager jobs “Refresh From My Oracle Support” and “Opatch Update” will be scheduled to update the software library. However, if these jobs have run successfully in the last 24 hours, then no new jobs will be scheduled.
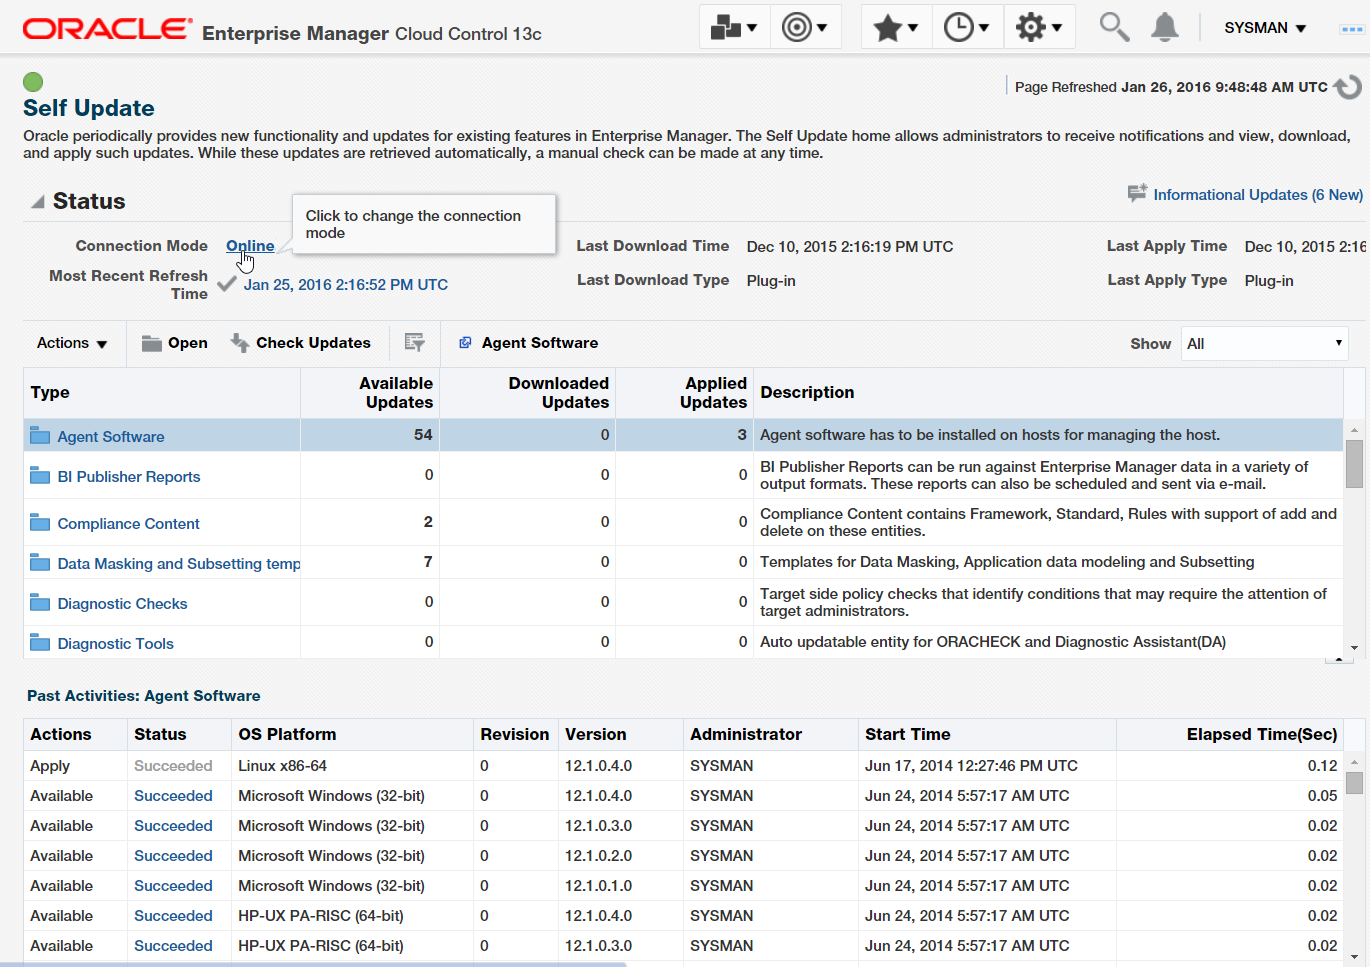
Now, you can set up Enterprise Manager Self Update. Login as SYSMAN or a super administrator. Select Setup | Extensibility | Self Update. The Self Update screen appears as shown in Figure 4.

Figure 4: Self Update: Connection Mode
Click on Connection mode to change from Online to Offline if required by company policy. Online is recommended, as mentioned previously.
Deploying the Plugins
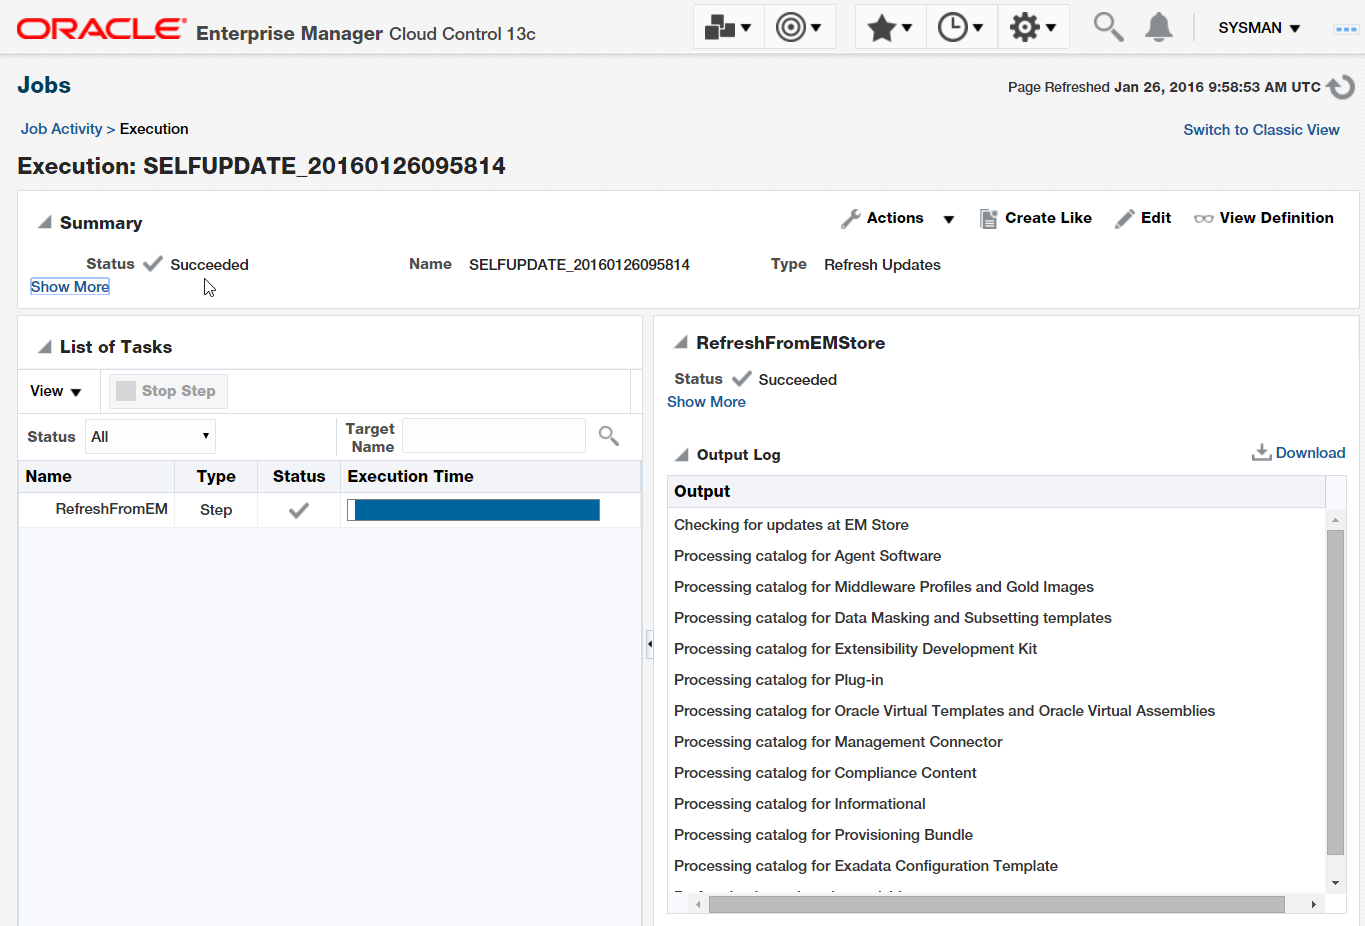
On the Self Update screen (Figure 4), click on the “Check Updates” button. A job is submitted to check for new updates from the Enterprise Manager store. Click on the Job Details link. The job details appear (Figure 5).

Figure 5: Self Update: Completed
The Self Update job completes in less than a minute. We will continue in the next part of this article series, and go through the next steps in the process.
(Disclaimer: The views expressed in this article are the author’s own views and do not reflect the views of Oracle Corporation. The author has written this article as an independent, unbiased cloud architect/consultant.)
Start the discussion at forums.toadworld.com